This post may contain affiliate links. Please read my disclosure policy.
The buzz around town is all about “Sous Vide”. But what in the world is that? Boiling meat sounds gross, right? I’m here to assure you, it is NOT boiling meat at all! Sous Vide cooking turns out the most tender, juicy, meat and flavorful food you will ever make!
Welcome to learning all about sous vide cooking and how it can enhance your cooking experience exponentially! In fact, chefs worldwide have known about this secret cooking method for years. Some of the most high-end restaurants use sous vide cooking to perfect the steaks you pay top dollar for.
Good news- below you will find a great introduction to the sous vide method and all you can do with this magical way of cooking.
Intrigued?
What is your pleasure- steak, chicken, salmon, or pork tenderloin? Vegetables, eggs? You name it and sous vide cooking makes a perfect version of it!
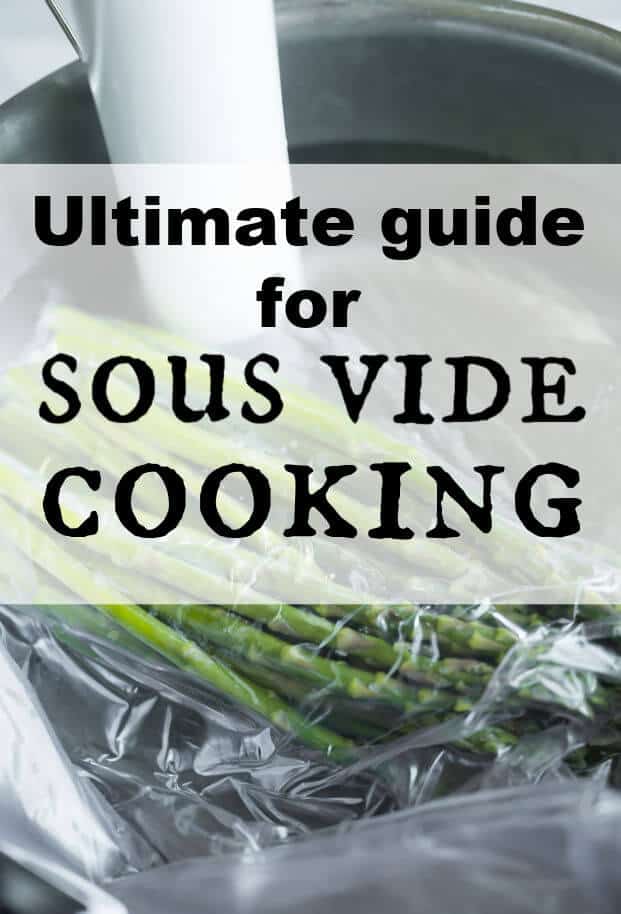
What is Sous Vide Cooking?
Sous Vide cooking is a method somewhat new for many home cooks in America. Most people do not realize restaurants have been using it for years.
Sous vide cooking was invented in the early 1970s in France. The word translates to “under vacuum”. I know, sounds weird, but hang with me.
It’s a method of cooking your food sealed in a plastic pouch, or “under vacuum”, in a temperature-controlled water bath. This method of cooking gives you results that are impossible to achieve with any other cooking technique.
With the sous vide method, you typically cook food at a lower temperature for a longer time. The temperature and time depend on the food you’re cooking, but the results are amazing every time! Seriously, it is the best food you’ve ever eaten!
Why You Will Love This Method
-
Edge to Edge Perfection: When you cook with a sous vide device, your meats will be edge to edge perfect. No more rare on the inside, but crisp on the outside. It is evenly cooked and just right!
-
Intense Flavor: Because the bags seal all of the juices and seasonings in, no flavor is escaping through steam. Food, in general, is much more flavorful.
-
Hands-off cooking: Set it and forget it. Once it starts cooking, just set the timer and you’re free to prepare the remainder of the meal, do a load of laundry, or even read a book! The choice is yours.
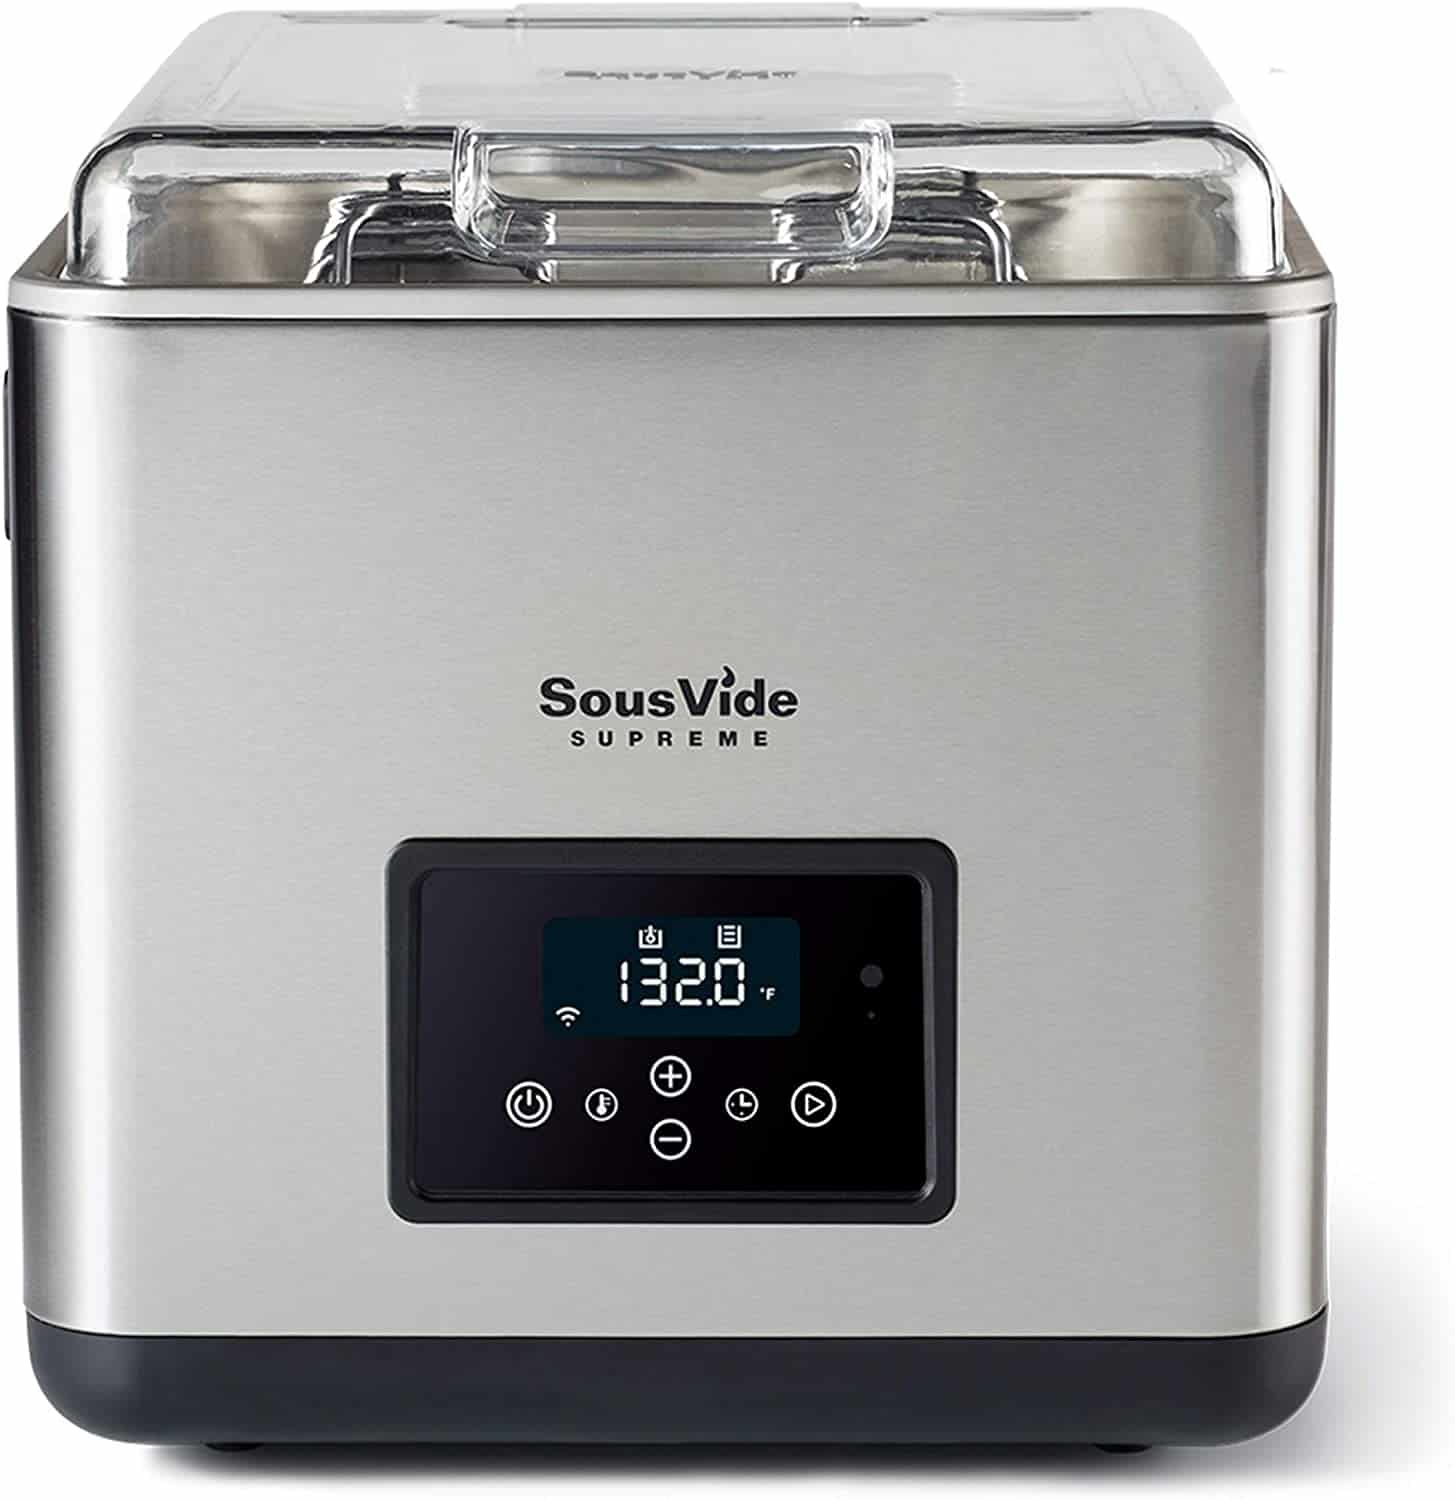
Best Sous Vide Machines
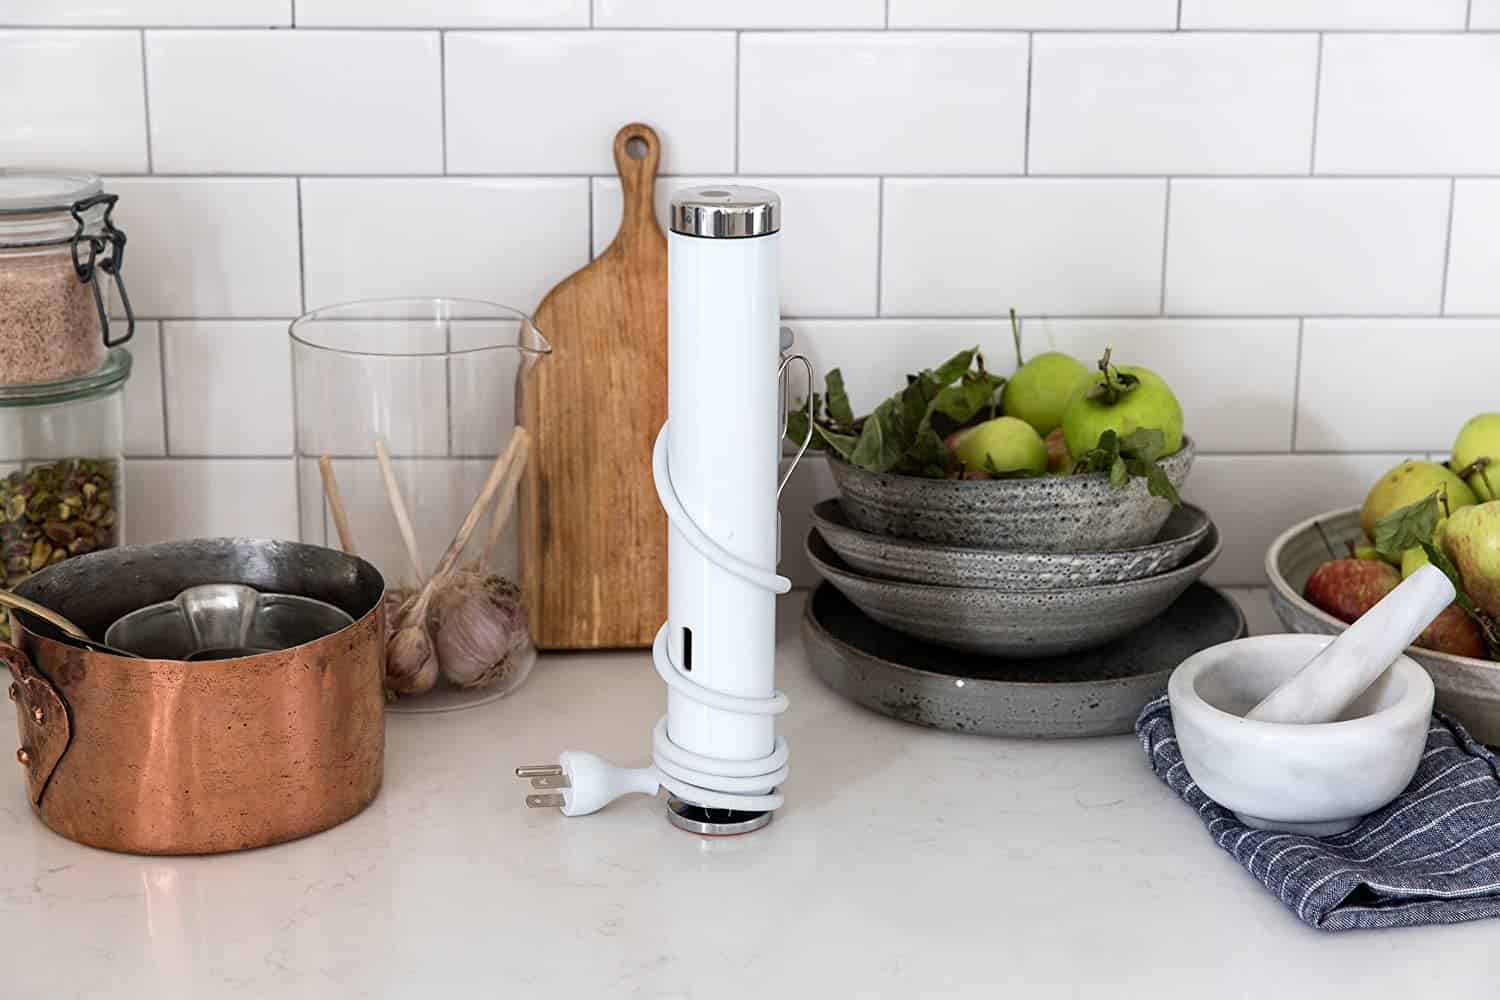
There are two types of Sous Vide Cookers. One is a small oven that sits on the countertop. The others are wand-type devices that are very convenient. You just clip it on to the side of a large pot (That is what I use).
- The Breville Joule Sous Vide wand is a great choice for first-time SV cooks. The app is easy to use and it is so convenient to store. It’s more compact than the Anova Sous Vide. Plus, it is magnetic, so it easily attaches to the bottom of your pan. It does have a clip as well. I feel the Joule heats water the faster than the other wands.
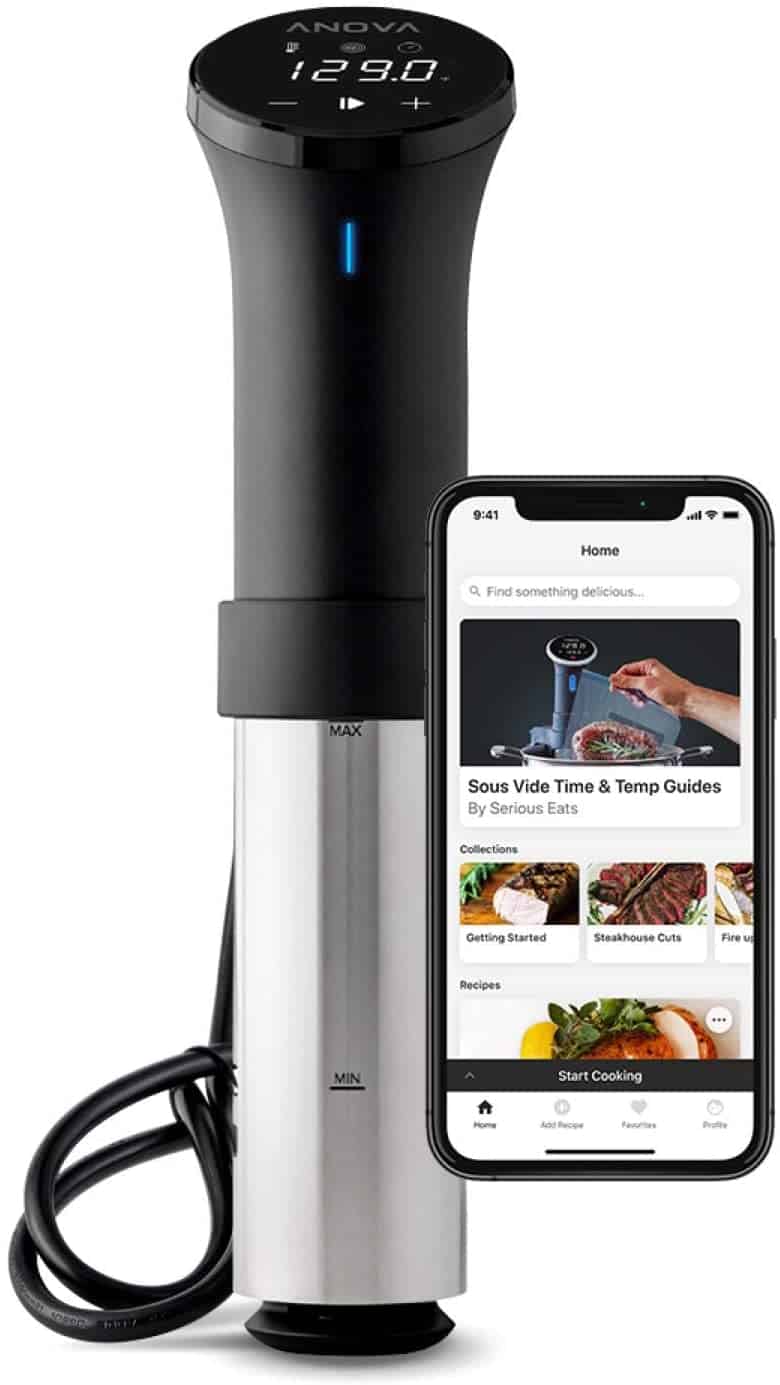
- The Anova Sous Vide wand is another great choice, but for different reasons. You see, the Anova has an app, just like the others. But, it also has the controls on the handle, so you do not have to use the app if you do not prefer to. (It is perfect for when the Wifi goes out.)
- Then there is the Sous Vide Supreme Touch Oven. This is the type of sous vide machine that the hotels and restaurants use in their kitchens. It is bulky and much more expensive. But if you have room, this water oven is amazon echo and dot compatible!
There are less professional, less expensive ovens as well, like this one by Dash. I’m a fan of a clear counter top, so I stick with the wands. I own both the Joule and the Anova.
Tools You Will Need
- A Sous Vide Device
- Gallon Sized Bags: Any zippered plastic bag works. I prefer the freezer bags because they are a little thicker. If you have a vacuum sealer and the bags that go with it, those work well. But you do not have to go out and get one.
- Large Pot: The container you need for your meal depends on the size of the pieces of meat you are cooking. Usually, a dutch oven pot is just right. I’ve used a cooler for large batches, but not often.
- Chip Clips: Helpful for clipping the bag to the side of the pan
Optional Accessories
If you are the type of home chef that likes to have all the gizmos and gadgets you can collect, there are plenty of optional tools and accessories you can add to your sous vide journey. Here are some of the options to consider:
- Weights: Eliminate floating bags with these weights placed on top of the submerged bag. Vegetables have a tendency to float, so these work great.
- Magnetic Weights: Keep your bag clipped to the side and submerged with these magnets.
- Sinker Weight “Blanket”: Yet another type of weight, this chain-weighted blanket will hold the bag down and keep it submerged until cooking is complete.
- Culinary Torch: Play with fire! Great tool to sear the food and not get a pan dirty or turn on the grill!
- Vacuum Sealer and bags: This complete kit comes with a pump, bags, clips, and more! Or you can use a traditional food saver system.
- Cooking Containers: There are plenty of plastic cooking containers to choose from if you do not want to use a pot.
- Rack Dividers: Rack dividers keep multiple bags of meat from wobbling and hold them in place.
How to Sous Vide
There are 4 basic steps in sous vide cooking. Step 4 is most often used with meats, and is optional, but recommended.
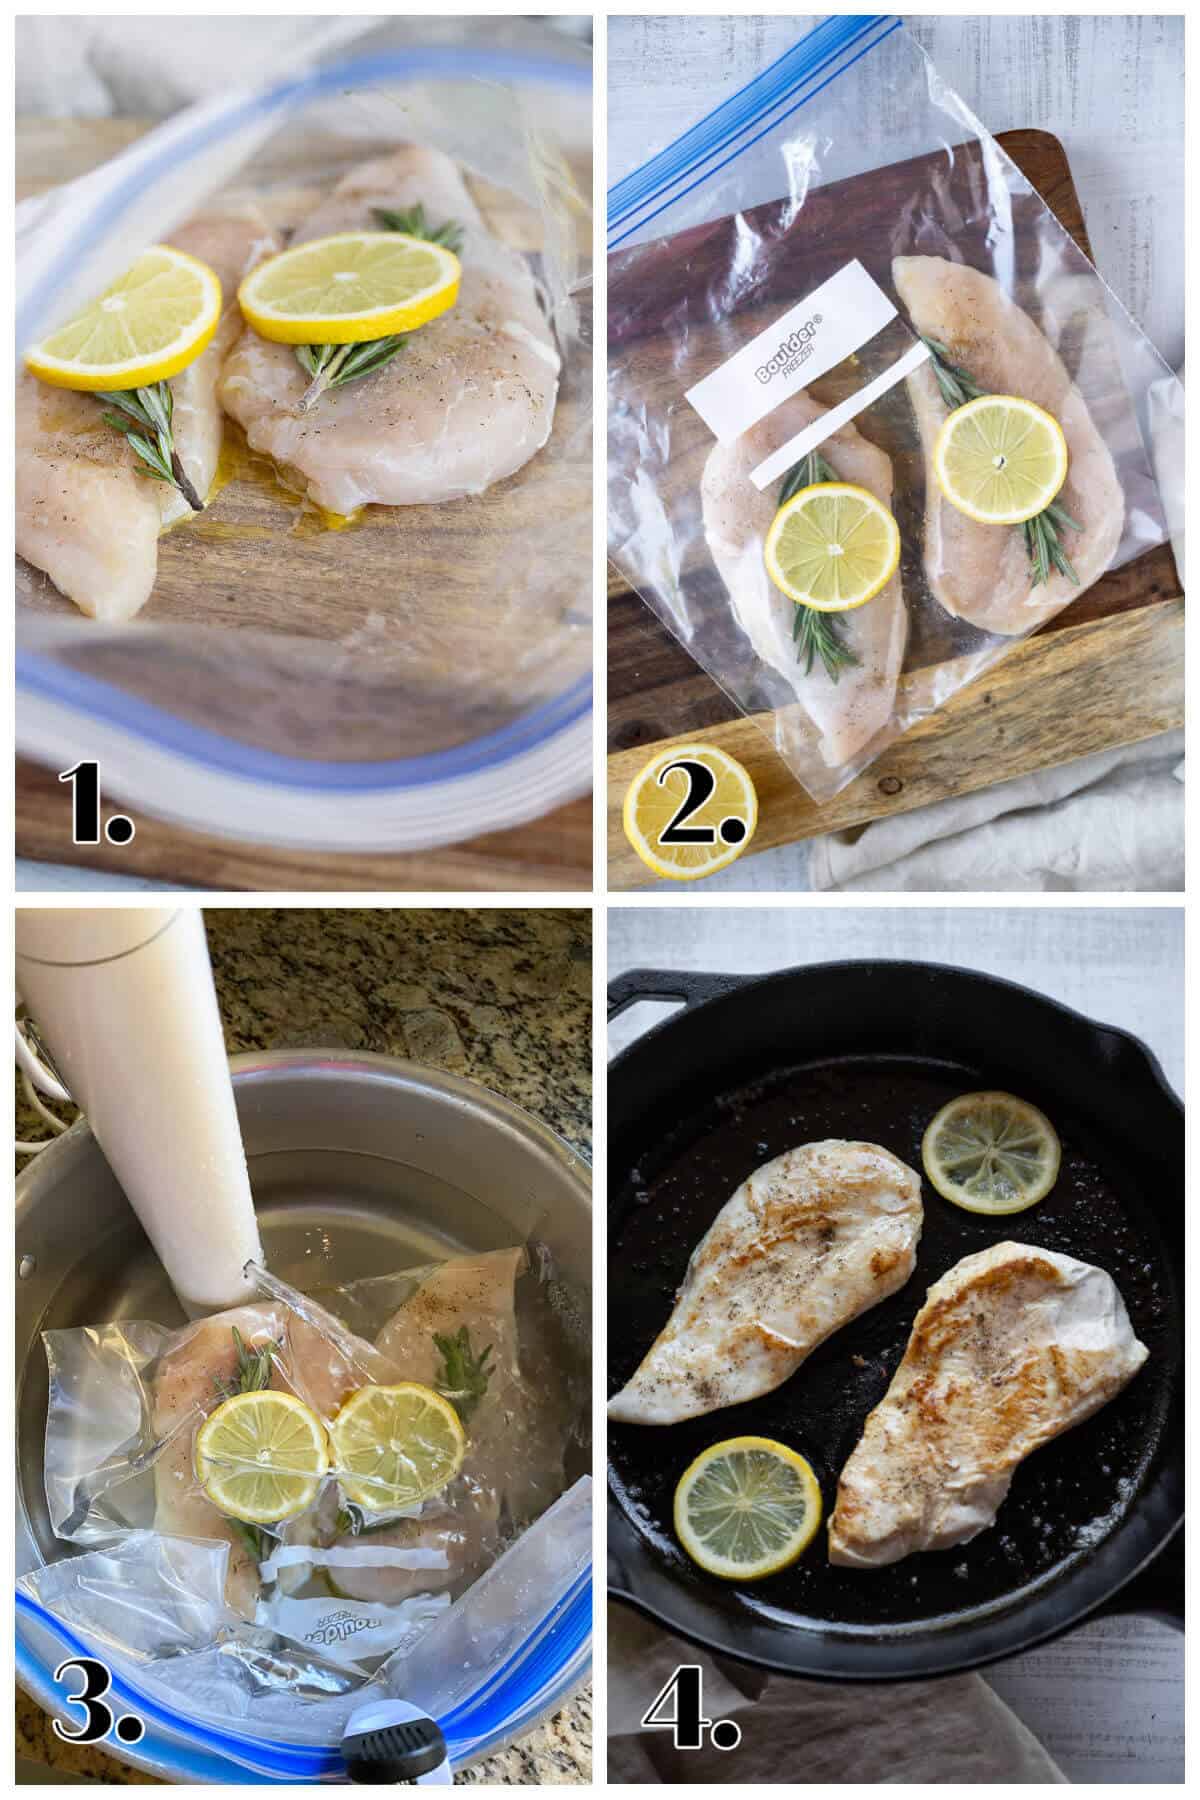
Step 1 | Season
Protein begs to be seasoned, right? This is where you add your salt, pepper, and any flavor you would like. One clear benefit to cooking with a sous vide device is that the seasonings get infused into the meat- resulting in HUGE FLAVOR and incredible tenderness.
Side note: Many of the instructions you will come across say all you need is olive oil and then you can season afterward. That is right! You can season either before or after you cook the meat.
Step 2 | Seal it Up
Once the food you choose is seasoned well and ready to be cooked, place it in a zippered bag with a bit of olive oil, butter, or ghee, and remove all of the air.
Make sure the seal is tight and no air is in the bag so it will sink, and not float in the water bath. The water displacement method works GREAT to get all the air out, and the directions for that are below.
Step 3 | Set the Time & Temperature
This is where technology comes in very handy once again. The Joule and The Anova come with phone apps to help you determine the water bath temperature and time for cooking to perfection. Then you can set it and forget it- until the timer goes off, that is.
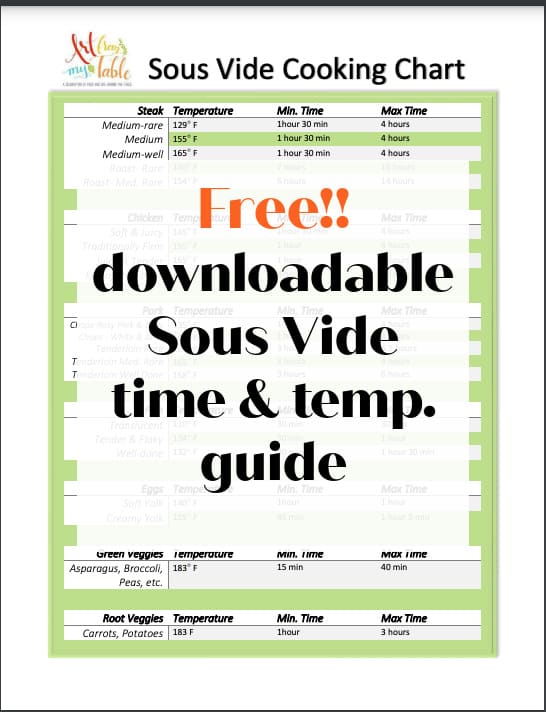
I’ve included a chart below to help you choose time and temperature based on your desired result, and for manual settings.
So, go ahead, drop the bagged food into the bath of warm water, set the app, and go about preparing the rest of the meal.
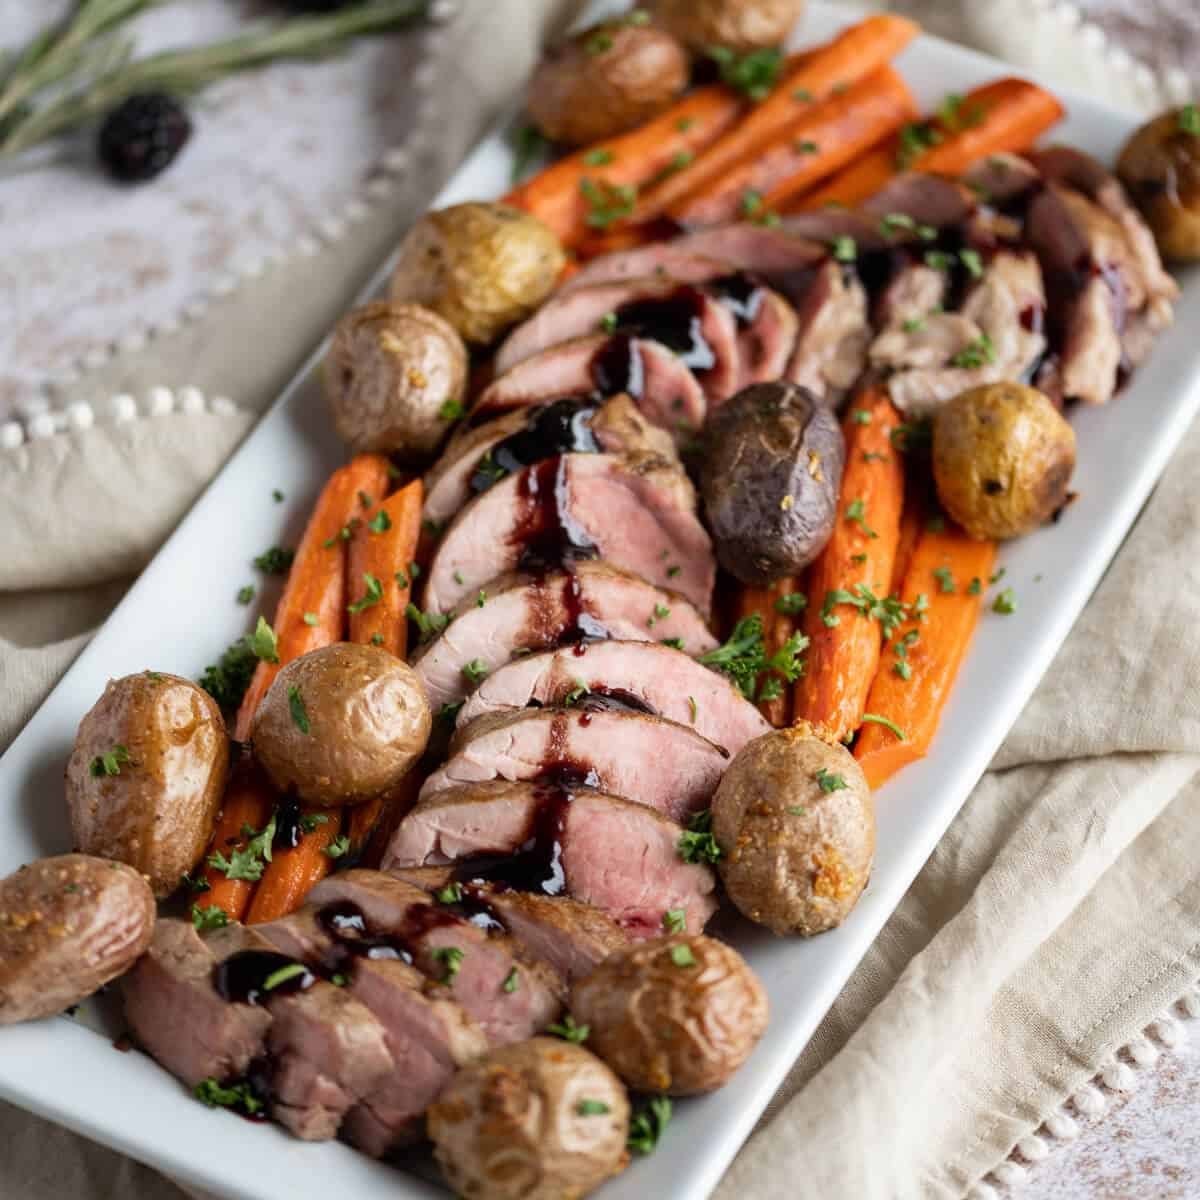
Step 4 | Sear
Searing is what gives you that beautiful golden ‘crust’ on your meats. You can do this in a screaming hot pan, or on the grill.
When the protein is finished cooking, let it rest as you heat up a skillet or the grill. Then remove the meat from the bag and sear it for 1 minute per side.
And Voila! You have just elevated your cooking game. Oh yeah!
****Note- you don’t sear vegetables or other types of food with sous vide, just meat.
Expert Tips
- Sear or grill your meats to finish them, adding that golden browning you are used to. But remember, it is already cooked, so only keep it on for 30-60 seconds per side.
- Always allow room for the water to circulate around the meats. If the pot is crowded with bags, switch to a larger pot for better water flow.
- Use chip clips to clip the bags onto the side of your cooking pot. This holds the bag in place and makes it easier to remove from the hot water when finished.
- If the bag of food wants to float, weigh it down with a spoon or two (right inside the bag if you choose). I’ve also used a bag of marbles and set it right on top of the bagged food to push it down. Remember, it needs to be fully immersed while cooking. you can also purchase sous vide cooking weights if you prefer. I find I need to weigh vegetables down, meat usually sinks.
- Protect your work surface. Use a trivet underneath the pot you are cooking in to protect your countertop.
The Displacement Method
This is the ideal way to get all the air out of the bag before it is immersed in the water bath. And it is so simple!
- Seal the bag up to the corner, pressing out as much air as you can.
- Start to immerse the bag into the water. Watch your fingers, the water is hot!
- Using a spoon, press the bag down into the water, being careful not to allow the top corner to go under. The water pushes out all the excess air, then you can seal the remaining corner of the bag. See? –Simple!
Sous Vide Cooking Chart
These times and temperatures are approximated to help you on your sous vide cooking journey. The app on your device will have the times that particular sous vide device is able to deliver the tender, juicy, and flavorful meal.
| Steak | Temperature | Min. Time | Max Time |
| Medium-rare | 129° F | 1hour 30 min | 4 hours |
| Medium | 155° F | 1 hour 30 min | 4 hours |
| Medium-well | 165° F | 1 hour 30 min | 4 hours |
| Roast- Rare | 140° F | 7 hours | 16 hours |
| Roast- Med. Rare | 154° F | 6 hours | 14 hours |
| Chicken | Temperature | Min. Time | Max Time |
| Soft & Juicy | 145° F | 1hour 30 min | 4 hours |
| Traditionally Firm | 155° F | 1 hour | 4 hours |
| Juicy & Tender | 165° F | 1 hour | 4 hours |
| Fall-off-the-bone | 165° F | 4 hours | 8 hours |
| Pork | Temperature | Min. Time | Max Time |
| Chops-Rosy Pink & Juicy | 135° F | 1hour | 4 hours |
| Chops – White & Juicy | 147° F | 1 hour | 4 hours |
| Tenderloin Rare | 165° F | 3 hours | 5.5 hours |
| Tenderloin Med. Rare | 165° F | 3 hours | 4 hours |
| Tenderloin Well Done | 158° F | 3 hours | 6 hours |
| Fish | Temperature | Min. Time | Max Time |
| Translucent | 110° F | 30 min | 30 min |
| Tender & Flaky | 124° F | 30 min | 1 hour |
| Well-done | 132° F | 30 min | 1 hour 30 min |
| Eggs | Temperature | Min. Time | Max Time |
| Soft Yolk | 140° F | 1hour | 1 hour |
| Creamy Yolk | 155° F | 45 min | 1 hour 5 min |
| Green Veggies | Temperature | Min. Time | Max Time |
| Asparagus, Broccoli, Peas, etc. | 183° F | 15 min | 40 min |
| Root Veggies | Temperature | Min. Time | Max Time |
| Carrots, Potatoes | 183 F | 1hour | 3 hours |
Printable Cooking Chart
Frequently Asked Questions
Yes, Any food-safe zippered storage bag works well, so there is no need to splurge on special bags or a vacuum sealer. Just be sure to get the sturdier freezer bags or the gallon-sized bags, since they are typically a bit sturdier.
Yes! You can safely cook meat from frozen using the sous vide method. The app for your sous vide device tells you what temperature and time to use for frozen or fresh meats. Typically for steak, you will need an extra 30 minutes of cooking time, for chicken breast, an extra 60 minutes. It does depend on the type and cut of meat you are using though and will vary.
Sure! Having a big party? No problem. Simply use a cooler and place the wand in the water, then close the lid. You can cook large ribs briskets, tenderloins, and more in there and have them all perfectly cooked! (Just be sure you cut the portions to fit your zipper bags!)
More Sous Vide Recipes
- Sous Vide Pork Tenderloin
- Sous Vide Chicken
- Perfect Asparagus- Sous Vide
- Sous Vide Steak
- Sous Vide Tri-tip
Please share
Your shares are how this site grows, and I appreciate each one. Do you know someone who would enjoy this recipe?
I’d love it if you shared it on your favorite Pinterest board or Facebook! AND…if you like this recipe, please do me a favor and give it a ⭐️ ⭐️ ⭐️ ⭐️ ⭐️ rating! TIA 🥰
You can also follow along on YouTube and Instagram!
HUNGRY FOR MORE? Subscribe to my newsletter to have recipes delivered to your inbox and to stay up to date on the latest!