This post may contain affiliate links. Please read my disclosure policy.
Hot cocoa bombs are so hot right now! (see what I did there? 😁) Learn how to make these adorable confections yourself with my ultimate guide!
They are so impressive from first glance to the explosion in the mug. They make wonderful gifts for all the winter holidays.
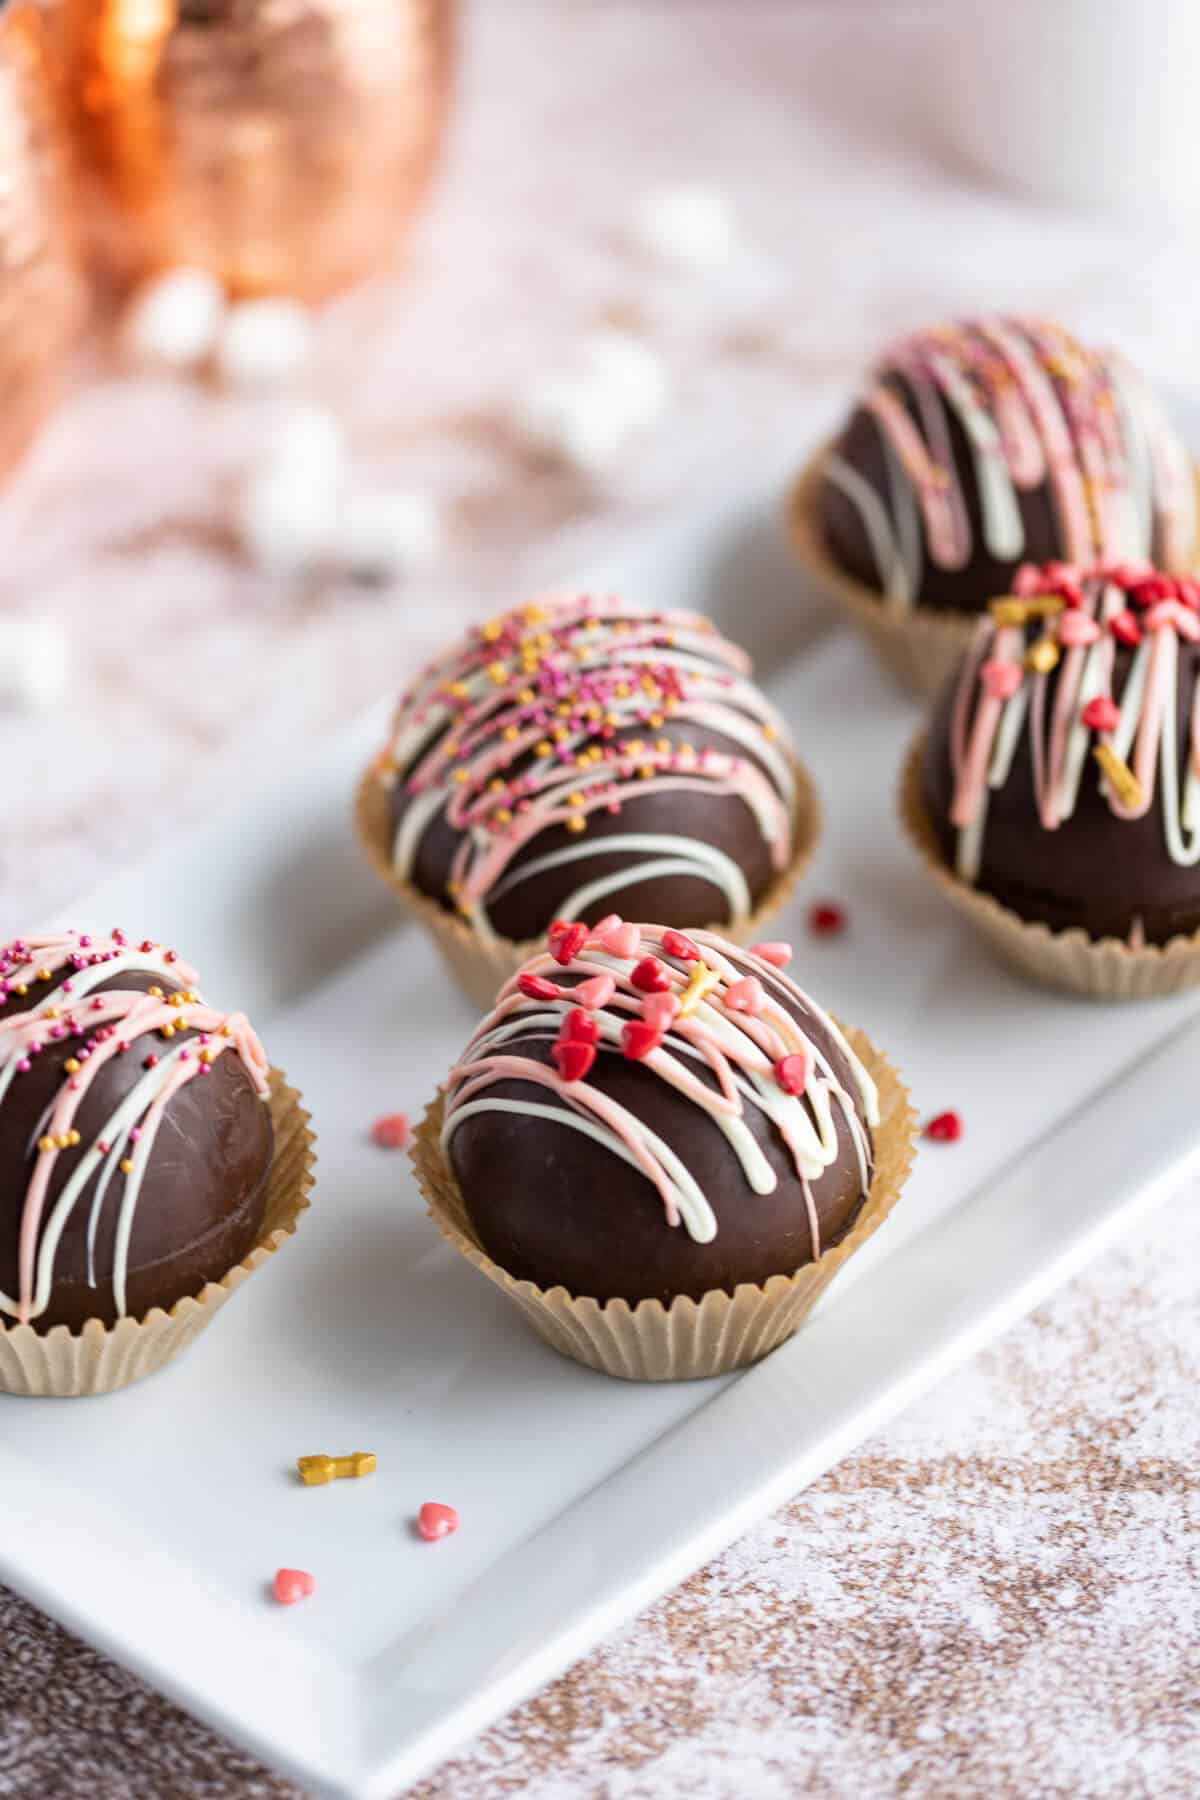
Valentine’s Day is approaching, and nothing says “I LOVE YOU” quite like CHOCOLATE! ❤️
I’ve been practicing these for months now, and today I’m sharing all my tips with you and the things I’ve learned along the way.
Before we begin, here’s a TRUTH BOMB for you. Are you ready? Hot Chocolate Bombs are not super easy to make.
What? Did you say NOT super easy? Yup, I did. It takes some practice. But, you will get it, and I’m confident you won’t want to buy them after you get it down.
They really can be fun to make, I think we all have a little creative piece to our personalities.
Once you get the process down, you can make your bombs in different flavors or decorate them with fun toppings to change them up every time.
Some of my favorite variations are listed later in the post. And while we’re talking about yummy hot drinks, you’ll want to save this Chai Tea Latte recipe as well.
Frequently Asked Questions
Hot cocoa bombs are chocolate spheres filled with hot cocoa mix and marshmallows, or other yummy surprises. You place it in a mug, pour hot milk over top and it “explodes” and turns into a delicious cup of hot chocolate.
You can use either but milk is much creamier and smooth. Use 8-12 ounces of hot milk, depending on the size of your glass.
2 1/2″ in diameter. This allows plenty of room for marshmallows and your hot cocoa mix, but still fits in a mug. If they are too small, they are much harder to handle.
Just as you would store chocolate, at room temperature in an airtight container. They can be stored for up to 60 days. If they look chalky or streaky, that has to do with the type of chocolate used.
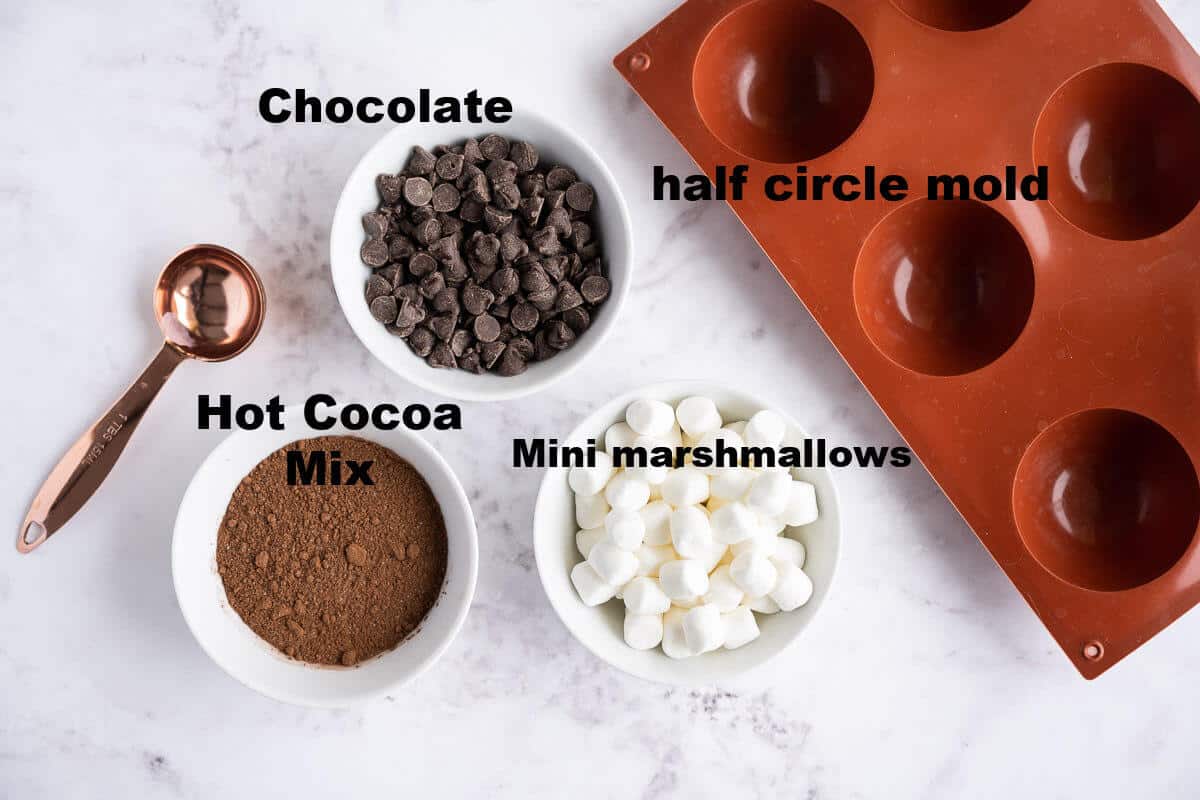
Key Ingredients:
You only need a few ingredients to make these.
- Silicone mold- 2 1/2 inch diameter is best.
- Chocolate– Be sure to keep reading for the best ones to work with.
- Thermometer (not pictured, but for tempering chocolate. I like a digital one)
- Hot cocoa mix (homemade or your favorite)
- Mini marshmallows– I just use regular minis, but dehydrated marshmallows are another option.
- (Optional) White chocolate for drizzling, sprinkles
The Best Chocolate to Use
A word on chocolate. There are two types of chocolate:
- Real
- Compound
Real Chocolate contains both Cocoa and Cocoa Butter. I would recommend using at least 60% cocoa.
Compound Chocolate contains other ingredients and stabilizers. Chocolate chips and candy melts are a good example of this.
How do you know what’s in it? Read the ingredients.
You can make Hot Cocoa Bombs with either type, however, your results will be far far better if you use real chocolate and you temper it. Don’t worry! I’ll show you how, it’s easy!!
That being said, I have made them both ways. I think you need to ask yourself a few questions to decide what’s best for you.
- Why are you making them? For gifts? For fun? To sell?
- How important is taste and texture to you?
And I do want to mention, that I do NOT recommend, under any circumstances, candy melts. They are very waxy and they taste like it. (I might be a chocolate snob!)
My favorite chocolate to use is:
- Lindt 70% chocolate bar
- Lindt white chocolate bar
- Callebaut
- Ghiradelli white chocolate bar
AFMT TIP– When I made these using compound chocolate, I only needed one coat. When I used the real thing, I preferred two coats. One coat was quite thin and it wanted to slide away from the edge.
I still recommend real chocolate, but this is something you may want to know ahead of time.
Tempering chocolate
Tempering chocolate is the process of heating and cooling it in a specific way. When you temper chocolate you are breaking down the crystals and reforming them.
Real Chocolate properly tempered will give you a shiny chocolate result. And the chocolate has a nice snap when you break it or bite into it. It melts at body temperature, you shouldn’t even need to chew it. (This is what the pro’s use).
Real chocolate will also be much thinner than compound chocolate when it’s melted.
Compound chocolate can leave a chalky or streaky result. It melts at a little higher temperature.
How to do it
There are two ways to temper chocolate.
- In the Microwave
- Double Boiler
Tempering Chocolate in the microwave is the easiest way to do it. It’s best for smaller amounts of chocolate and not a huge batch.
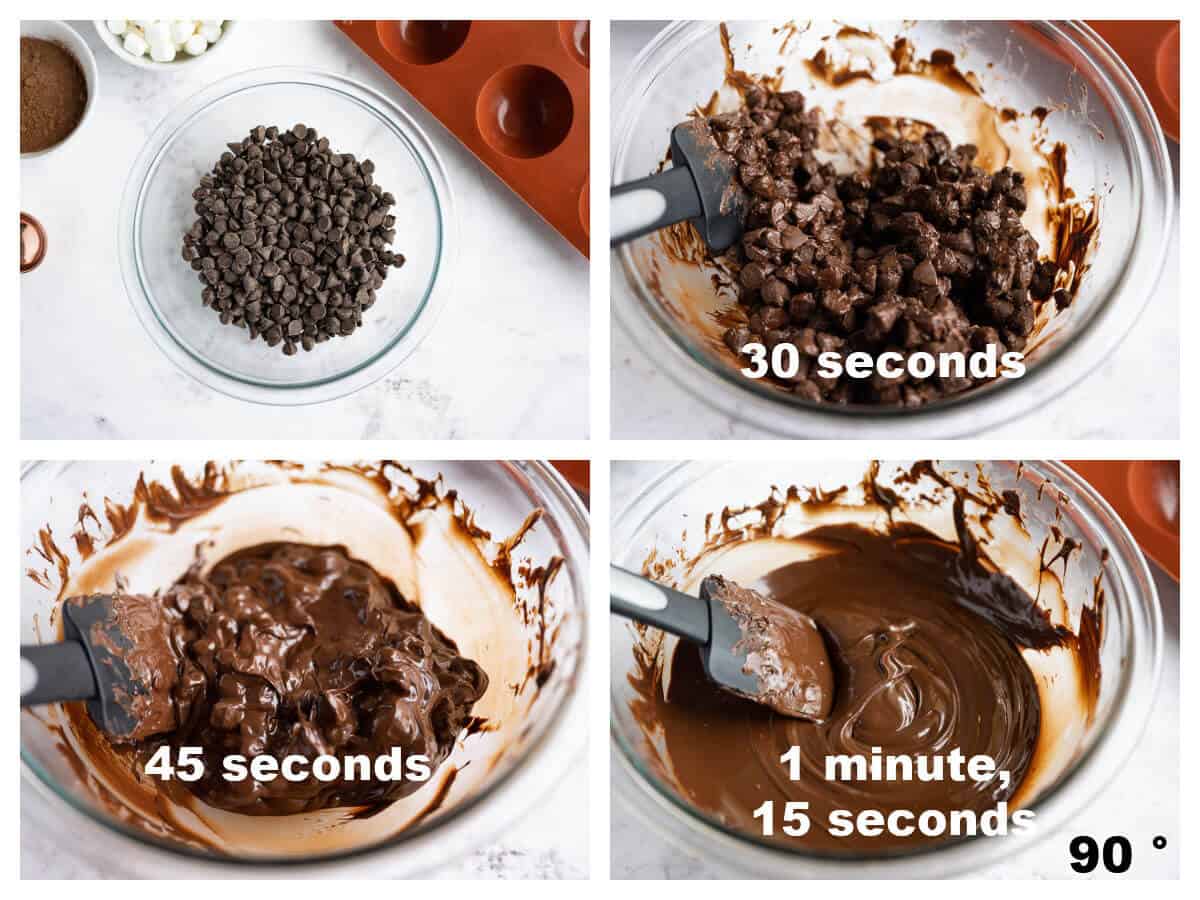
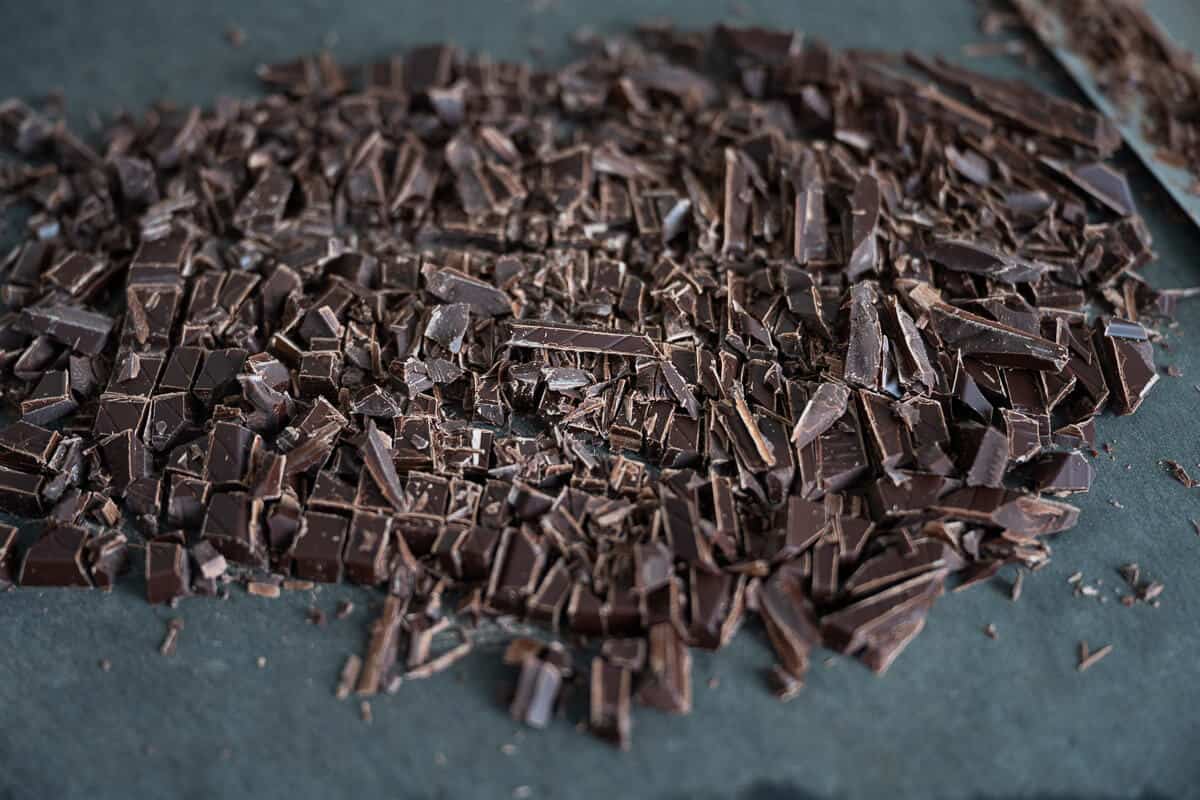
- Place the chocolate in a bowl. If you’re using a bar, finely chop it. Even if you’re using chips, it does help to chop it smaller.
- Put the chocolate in the microwave for 30 seconds. Stir well, check the temperature.
- Place it back in the microwave for 15 seconds. Stir well again, and check the temperature.
- Continue doing this until the chocolate is melted. for dark chocolate or semi-sweet, don’t let the temperature get over 90°. You may need to do smaller increments of heating as you get closer to the proper temperature.
Ideal Temperatures
- Milk chocolate– shouldn’t go above 84ºF (30ºC) to stay in temper
- White chocolate– shouldn’t go above 88ºF (31ºC) to stay in temper.
- Semi-sweet and dark chocolate– shouldn’t go above 90ºF (32ºC)
How to Make Hot Cocoa Bombs
Step One: Temper the Chocolate
Step Two: Mold the Chocolate

- Once your chocolate ready, spoon a small amount in the mold. Use the back of the spoon to spread the chocolate evenly up the sides of your mold.
- Make sure to spread enough chocolate along each side to form a thin layer all around the half-circle. The chocolate should be thin enough to melt easily but thick enough to hold the cocoa and marshmallows inside.
- Continue spreading the chocolate until all the half circles have been filled.
- Allow the chocolate to cool and harden completely. You can let the chocolate rest on the counter until it’s set. You can put it in the fridge or freezer to speed it up if you’d like (it takes about 5 minutes in the freezer).
- Once the chocolate is set, gently remove it from the mold. Simply push lightly on the bottom of the mold and carefully peel the side away to pop the half circles out.
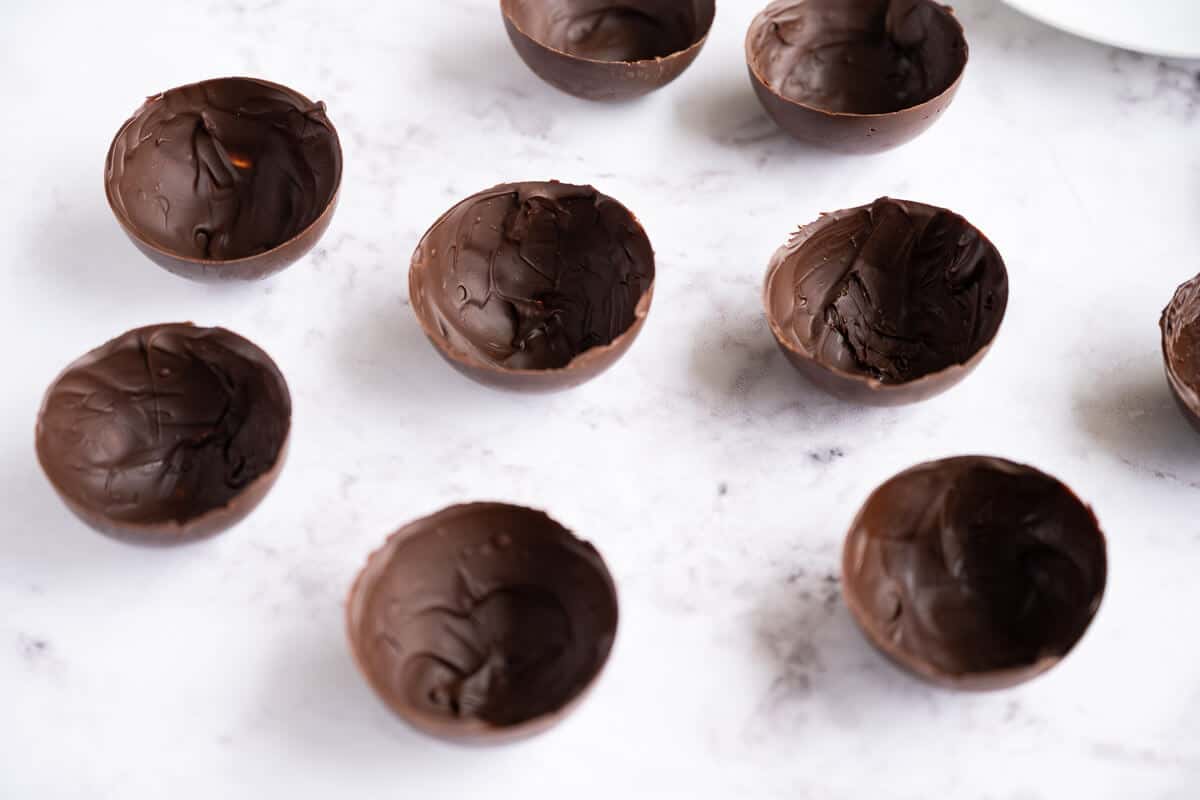
Step Three: Fill and seal
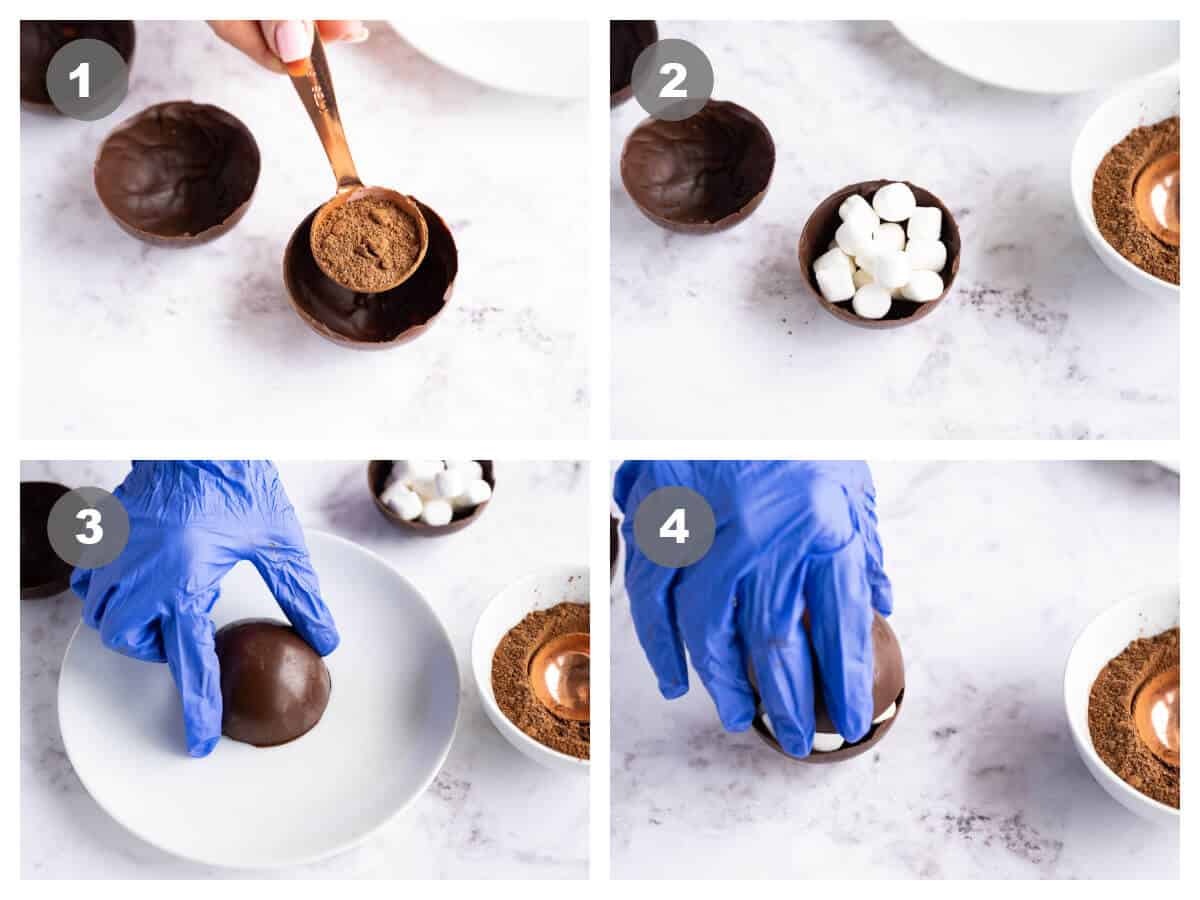
- Fill half of the molds with one tablespoon of hot cocoa mix and mini marshmallows.
- Use the remaining chocolate half circles to top your filled chocolate, creating a full hot chocolate bomb.
- Heat a glass plate in the microwave for one minute.
- Take a chocolate half circle and place the edge on the plate to melt it slightly.
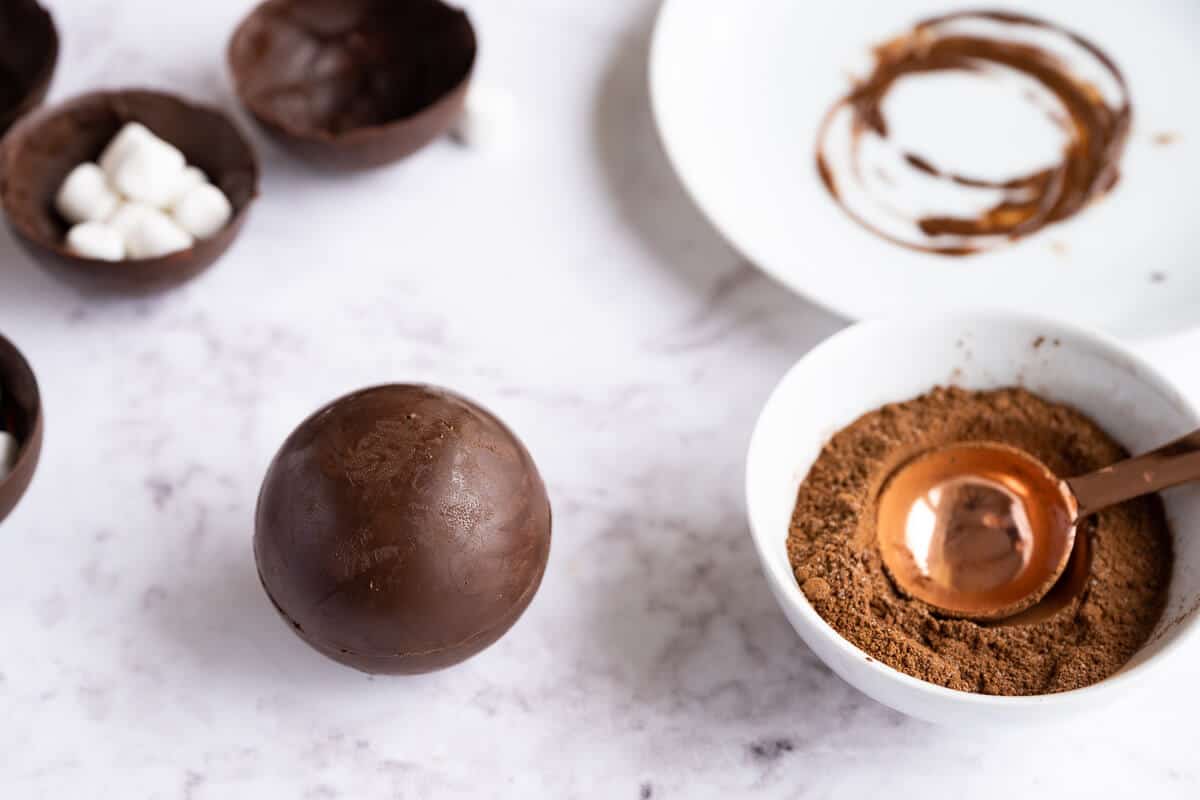
- Press that sphere on top of a filled sphere. Carefully line them up.
- Let the bombs rest until the chocolate has hardened.
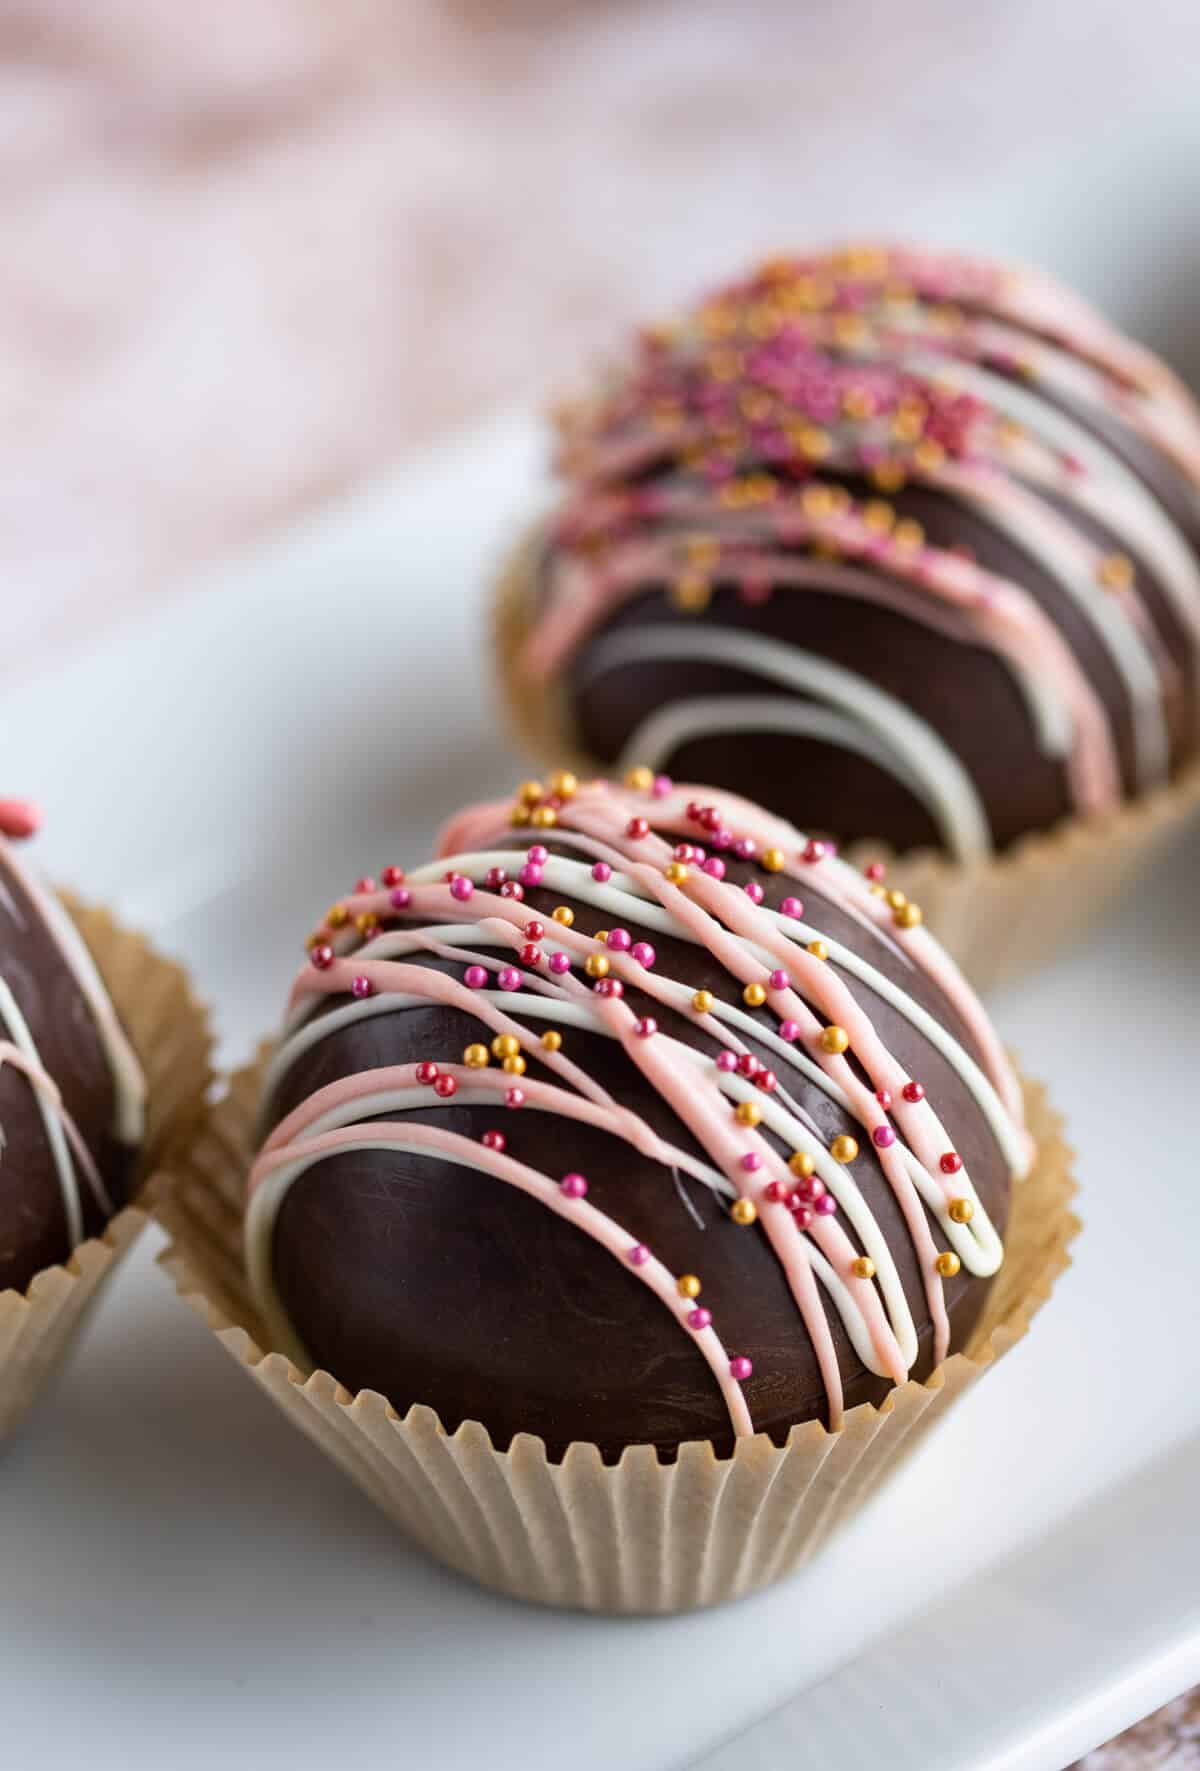
Step Four: Decorate Your Bombs
There are a variety of ways you can decorate your bombs. For drizzling I recommend a piping bag or even a plastic bag with a tiny hole cut in the corner so you can drizzle.
- Melting white chocolate and drizzling over the top (again, tempering works best).
- You can also color your white chocolate, but use an oil-based food coloring or colored cocoa butter, otherwise your chocolate will seize up.
- Drizzling melted chocolate on top and garnishing with sprinkles or mini chips.
- Using baking chips, like peanut butter or butterscotch, to add more flavor. (note that these typically aren’t “real” chocolate and won’t have the cocoa butter in them, however, they can be melted and drizzled just fine.
How to Use Hot Cocoa Bombs
And this is where the real fun begins!
- Heat up 8-12 ounces of milk, either in the microwave or on the stove.
- Place the bomb in a mug, then pour the hot milk over the top of the bomb.
The bomb will “explode” in your cup. And your tastebuds and belly will be so happy!
Notes
- To keep the chocolate bombs from melting in your hand, while you’re working with them, wear food-safe gloves.
- If the bombs don’t seal correctly the first time, use a warm spoon and run it along the seam, the chocolate will melt.
TIP: Remember, it may take you a few times to get the hang of it!
- If your spheres don’t come out with great edges: melt the edges of BOTH sides, I find this gives me a better fit. Melt one side, fill, then melt the other and join together. You’ll have a flatter edge to work with.
- You can also use a griddle, or skillet on very low heat to melt the edges for sealing.
- If you don’t want to mess with food coloring, you can use colored cocoa butter. Simply add it to melted white chocolate for any color you’d like! Plus you won’t sacrifice taste.
Flavor Ideas
There are many variations of these! Here’s a few ideas to get you started:
- Peanut Butter- Add a teaspoon of peanut butter (or peanut flour) inside the bomb, then, melt peanut butter baking chips and drizzle it over the top.
- Butterscotch– melt butterscotch baking chips and drizzle the melted butterscotch on top of the bombs. Garnish with toffee bits
- Mint hot chocolate–
- add a small amount of mint or peppermint extract to the hot chocolate mix.
- Or, use peppermint hot cocoa.
- You can also add crushed mint candies to the inside.
- Crushed candy canes are gorgeous on top
- Ande’s mints work great too for garnishing (hello St. Patricks Day!)
- White chocolate- melt white chocolate and spread in the molds. Use white chocolate hot cocoa mix inside for added flavor. Remember, same tempering rules apply! See temperature guide above.
- There are also many flavors of hot cocoa mix that you could use:
- Caramel
- White chocolate raspberry
- Milk chocolate
- Darl chocolate
- Lavender White Chocolate
- Gingerbread hot Cocoa
- Hazelnut
- Coconut
- Pumpkin Spice
- use colored mini marshmallows
- Garnish with sprinkles
- make it extra chocolate by drizzling chocolate on top and adding mini chocolate chips
More Cocoa Bomb Recipes
These are more unique and really fun!! Disclaimer: These may not be made the way I recommend, but the ideas are cute and can be adapted to my suggestions.
- Oreo Hot Cocoa Bombs
- Mocha Hot Chocolate Bombs
- Galaxy Hot Cocoa Bombs
- Fireball Hot Chocolate Bombs
- Pop Rocks Hot Cocoa Bombs
- Strawberry Hot Cocoa Bombs
- Rum Chata Hot Cocoa Bombs
More Sweet Treats
- Peanut Butter Cookie Bars
- Valentines Day Sugar cookies- these actually read secret messages!
- Homemade Chocolate Pudding
- French Style Coconut Parfait
- Lightened up Cheesecake with fresh berries
- Chocolate Hazelnut Drop Cookies (gluten free/dairy free)
- Strawberry Smoothie
- Strawberry Pineapple Smoothie
- Smoothies that are good for you but taste like dessert
HUNGRY FOR MORE? Subscribe to my newsletter to have recipes delivered to your inbox and to stay up to date on the latest!
Please Share!
Your shares are how this site grows, and I appreciate each one. Do you know someone who would enjoy this recipe?
I’d love it if you shared it on your favorite Pinterest board or Facebook! AND…if you like this recipe, please do me a favor and give it a ⭐️ ⭐️ ⭐️ ⭐️ ⭐️ rating! TIA 🥰
You can also follow along on YouTube and Instagram!

Hot Cocoa Bombs
Equipment
- silicone mold
- measuring spoon
Ingredients
- 1 1/2 cups chocolate finely chopped, high quality, includes cocoa and cocoa butter
- 6 tablespoons hot cocoa mix
- 1 1/2 cups mini marshmallows
Instructions
- Melt the chocolate in the microwave starting with 30 seconds and then moving to 15 second increments, stirring in between and checking the temperature. All the chocolate should be melted and no more than 90° (see notes for types of chocolate and temperatures)
- Place some melted chocolate in the mold and work it around the half sphere and up the sides. Be sure to get good coverage. You may need a second coat after it sets (see post for details).
- Let the chocolate set up either at room temperature (about 10 minutes) or speed it up by placing it in the freezer or refrigerator for 5 minutes.
- Remove the set chocolate from the molds. Fill half of the half-spheres with 1 tablespoon of hot cocoa mix and as many mini marshmallows that will fit.
- Take the remaining half-spheres, one at a time and gently melt the edge on a plate that has been heated in the microwave for 1 minute. Then place it over a filled mold to seal.
- After all the molds are sealed and set, you can decorate by drizzling additional chocolate and sprinkles.
- To serve, place the bomb in a mug. Pour 8-12 ounces (depending on the size of your mug) hot milk over it, stir. ENJOY!
Notes
- Milk chocolate– shouldn’t go above 84ºF (30ºC) to stay in temper
- White chocolate– shouldn’t go above 88ºF (31ºC) to stay in temper.
- Semi-sweet and dark chocolate– shouldn’t go above 90ºF (32ºC)
- To keep the chocolate bombs from melting in your hand, while you’re working with them, wear food-safe gloves.
- If the bombs don’t seal correctly the first time, use a warm spoon and run it along the seam, the chocolate will melt.
- If your spheres don’t come out with great edges: melt the edges of BOTH sides, I find this gives me a better fit. Melt one side, fill, then melt the other and join together. You’ll have a flatter edge to work with.
- You can also use a griddle, or skillet on very low heat to melt the edges for sealing.
- If you don’t want to mess with food coloring, you can use colored cocoa butter. Simply add it to melted white chocolate for any color you’d like! Plus you won’t sacrifice taste.


You’re welcome! Let me know how they turn out for you.
I’ve always wanted to make these Chellie! Thank you for such a detailed post.