This post may contain affiliate links. Please read my disclosure policy.
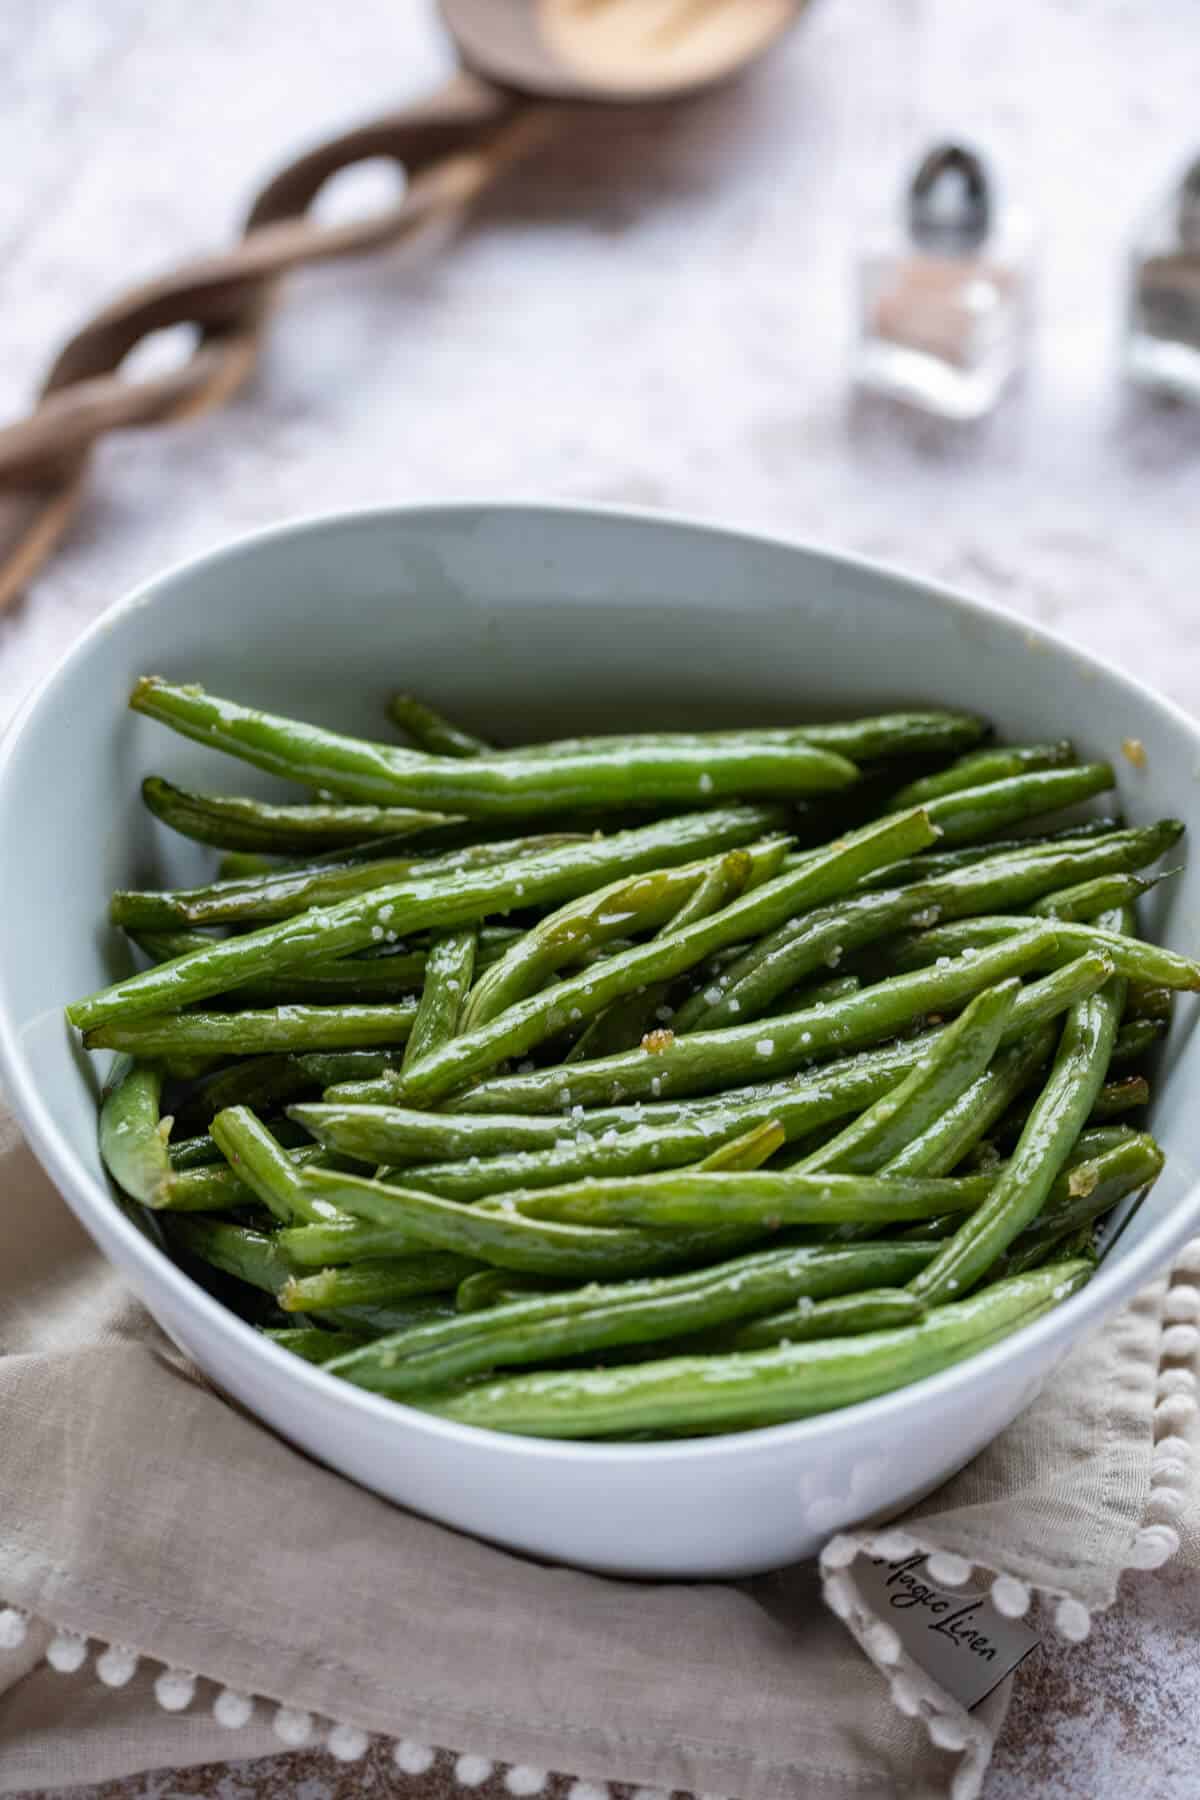
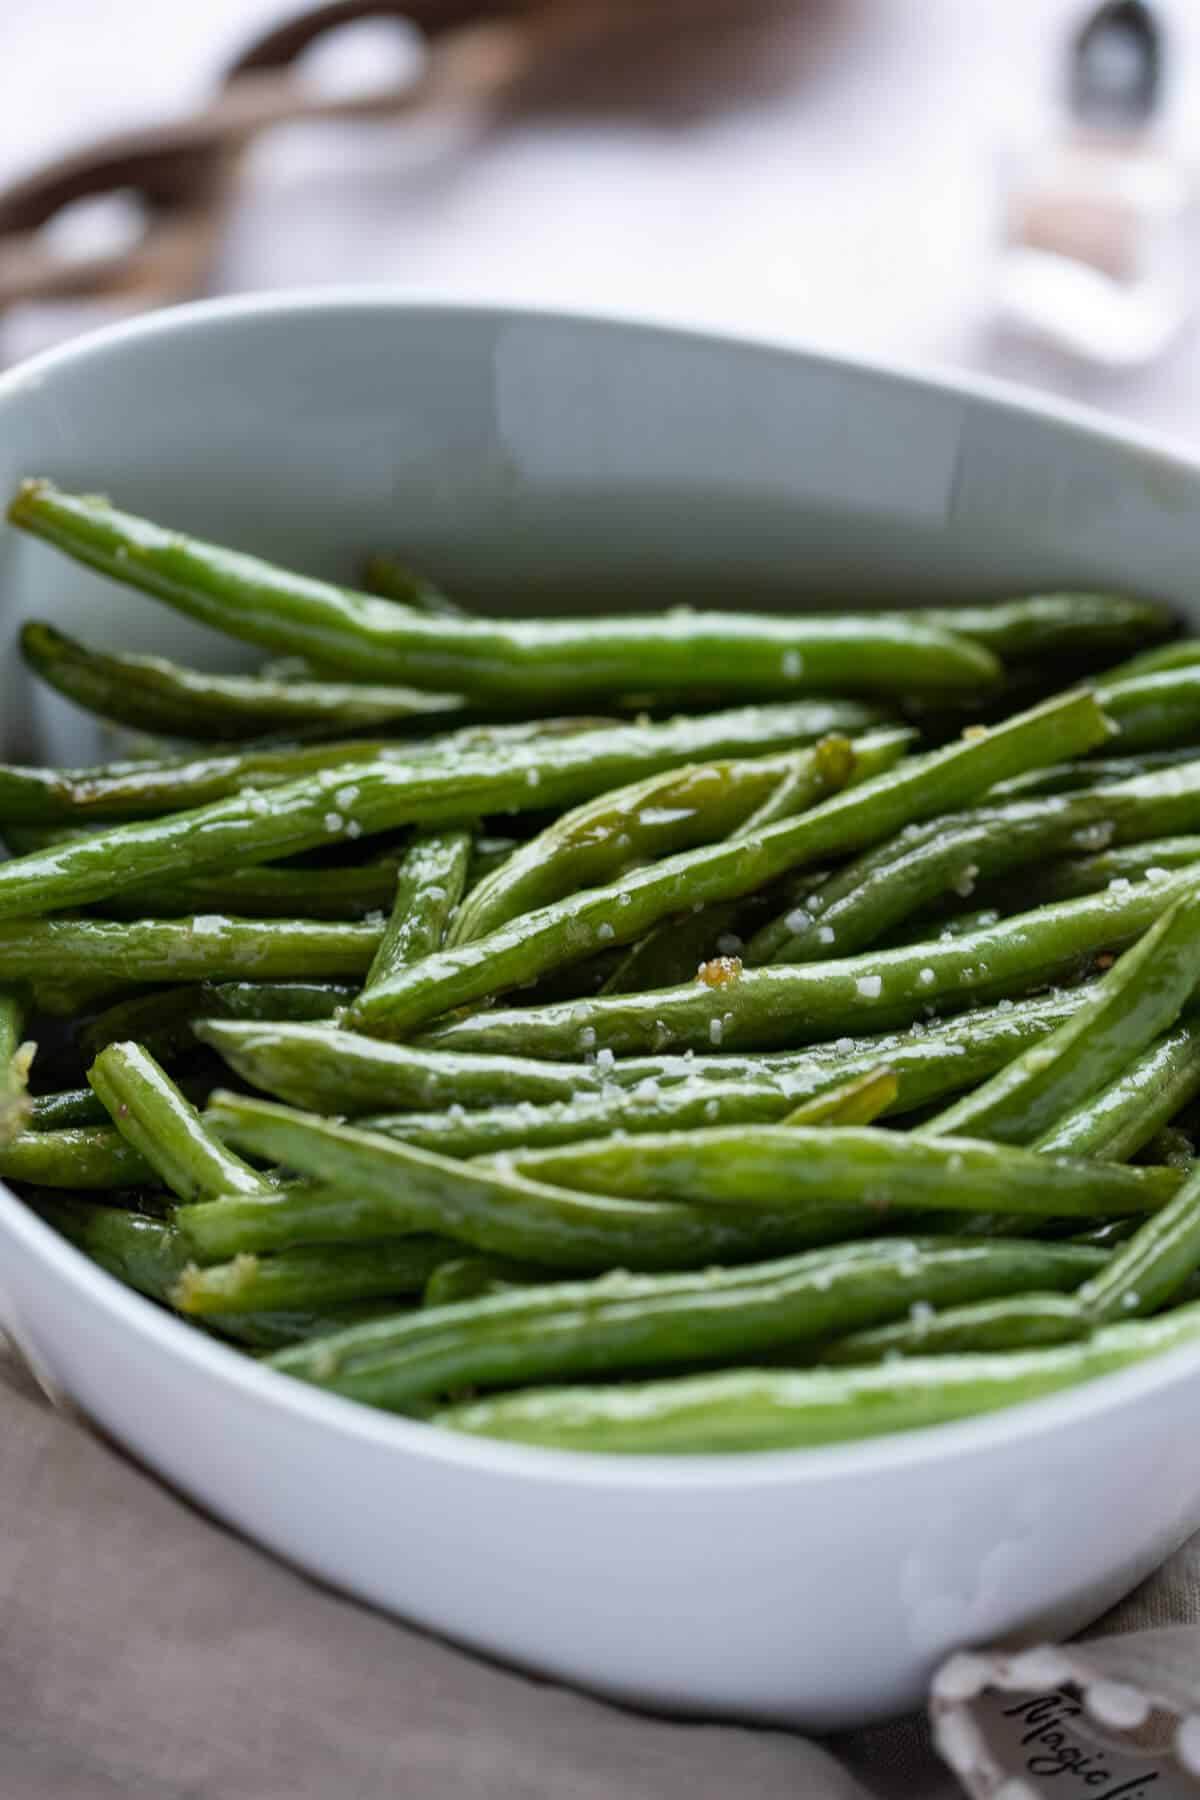
Savory garlic, butter, and a touch of sweet brown sugar- caramelized and roasted perfectly– make this Garlic Butter Green Beans side dish a delicious compliment to any meal!
Sometimes the simplest sides are sensational with a little added seasoning. These beans are one of my favorite go-to side dishes.
I love this roasting method because it’s quick, it’s only five ingredients, and it creates the perfect amount of crispness in the green beans every time! You may also be interested my Air Fryer Green Beans, they are zesty, healthy, and have a wonderful texture as well.
Even for the pickiest veggie eaters, the added sweetness and touch of butter flavoring makes these green beans irresistible.
Served straight from the oven, add this recipe to any dinner recipe. Some of my favorites include: Apple Cider Pork Chops, Savory Grilled Chicken, and Braised Beef.
Why you’ll love this recipe
- Only five ingredients
- Short Prep work
- 10 minute bake time
Key Ingredients and Substitutions
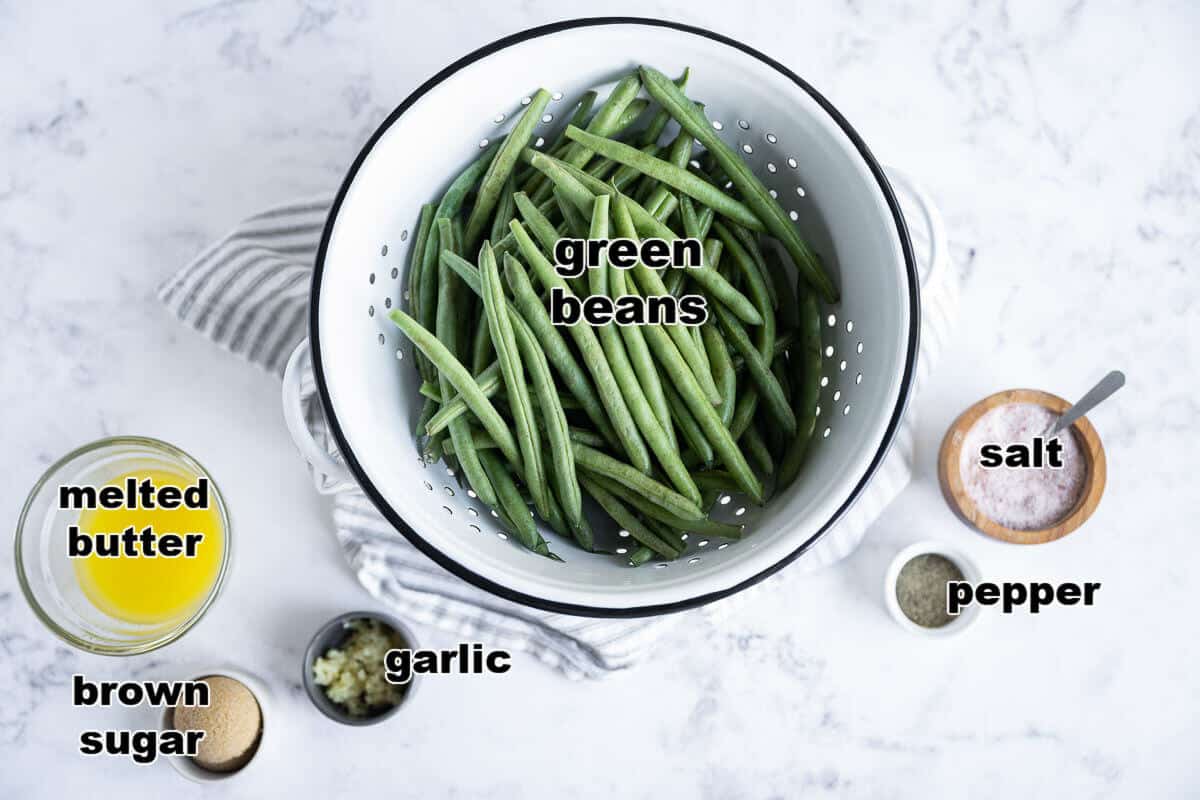
- Green Beans – To ensure your produce is fresh, look for a vivid green color. They should be crisp, and make a snapping noise when you break them. There should not be any dark green patches or limpness.
- Brown Sugar– Adds a bit of sweet. For a slightly healthier sugar, you can use coconut sugar, or go sugar free with a stevia based sweetener like Swerve Brown
- Garlic – Fresh is best! Use a press for easy prep. You could also use the jarred kind that is already minced, or garlic powder. If you use powder, use a scant teaspoon.
- Butter– Need I say more? Ha! I use unsalted butter because I like to control the amount of salt. Flavor is what it’s about. You can use olive oil, but it taste slightly different.
This recipe is versatile in that you can substitute several ingredients. You can also add ingredients. Try slivered almonds for a crunchy topping.
How To Make Garlic Roasted Green Beans
This is an overview of the recipe, for complete instructions, see the recipe card below.
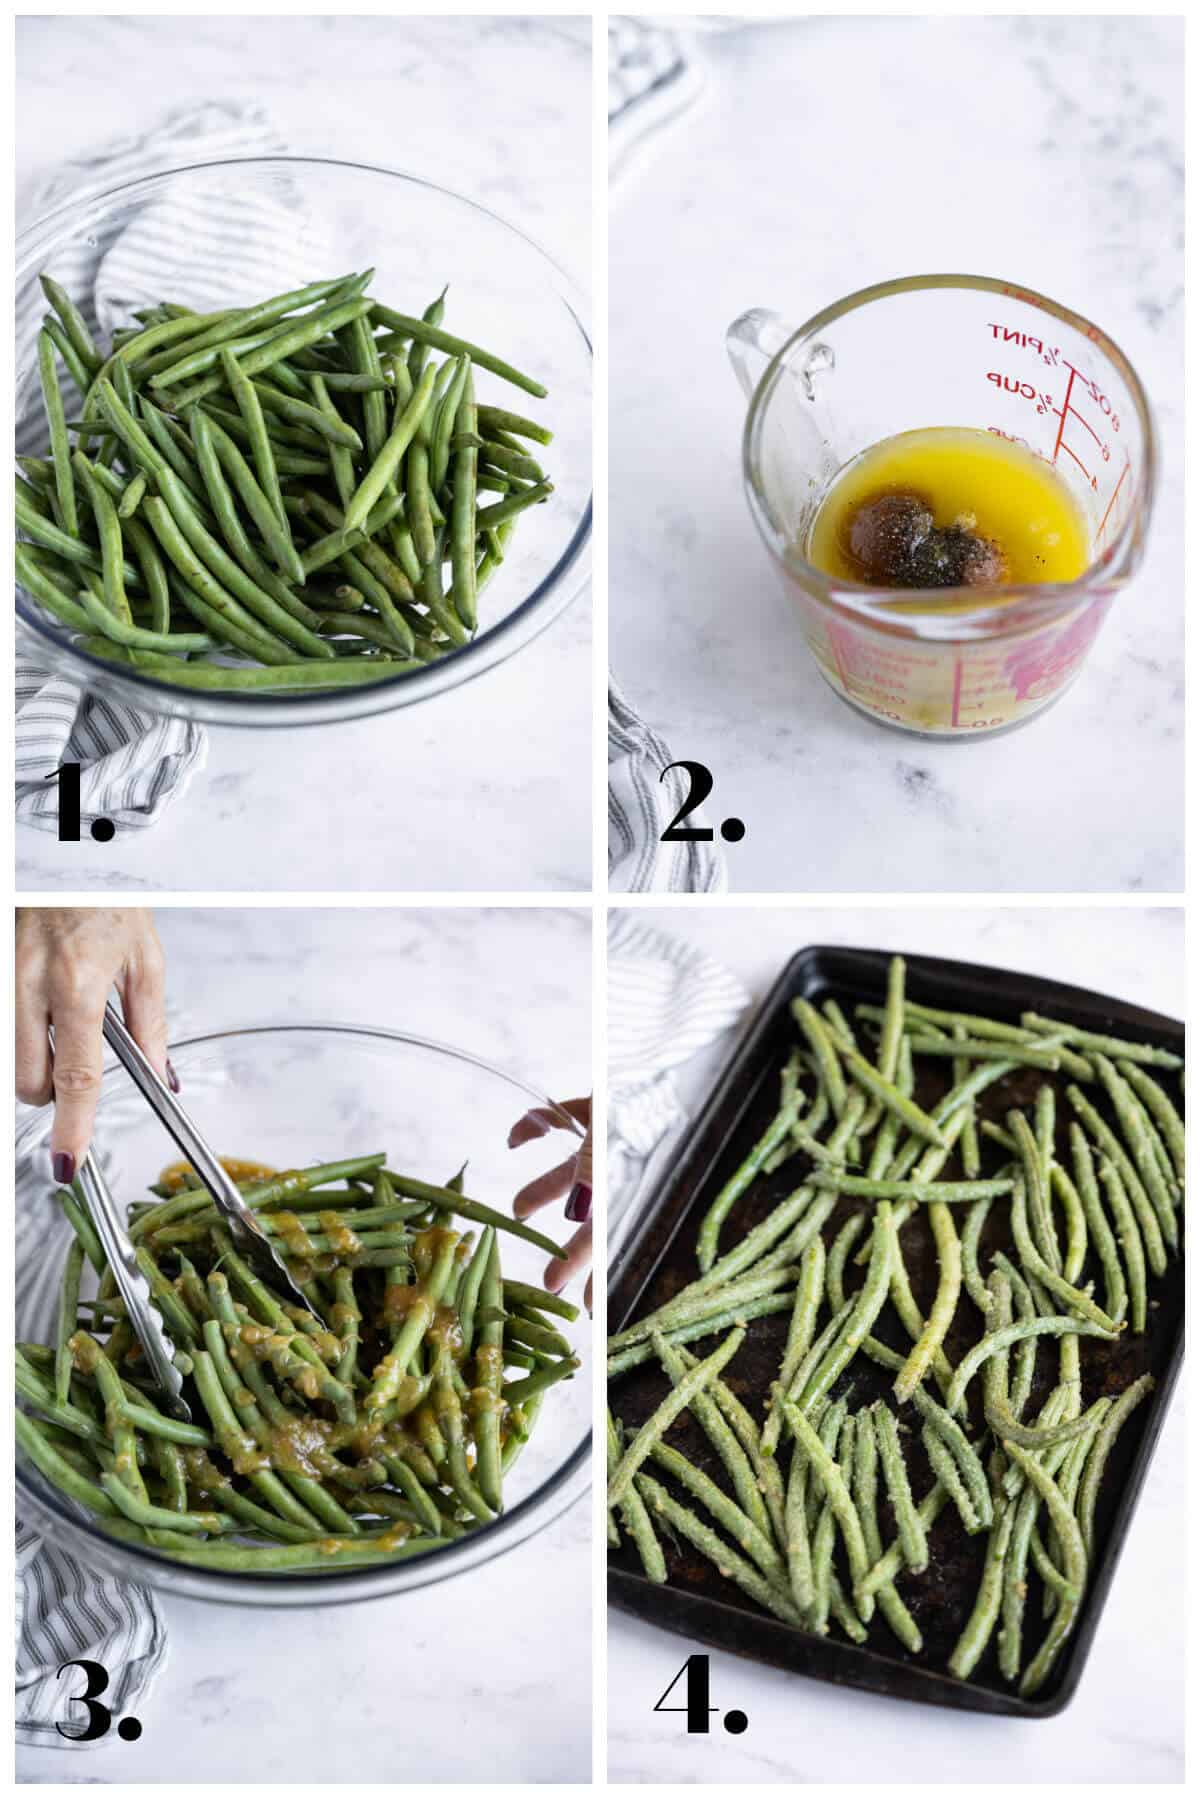
- Place the washed and trimmed beans in a large bowl.
- Melt the butter and add the garlic, sugar, salt and pepper, whisk with a fork to combine.
- Pour the garlic butter mixture over the beans and toss with tongs to coat evenly.
- Spread the beans in a single layer on a rimmed baking sheet. Bake at 400° for 10 minutes.
You’ll want to serve these immediately. They are best straight out of the oven!
Expert Tips
- Freshness Counts- When shopping for green beans, look for a bold green color and firm skin that makes a snapping sound when you break it in half. If your green beans aren’t fresh, they won’t taste nearly as good.
- Trim– Be sure that you trim your beans so that they don’t have the wiry stems on them. It’s annoying to take those off later.
- Coating is key– To get evenly cooked and seasoned green beans, be sure that when you are tossing them in the bowl, all of the beans get covered.
- Don’t overcrowd the pan. The air needs to circulate throughout the food for perfect roasting. You may need 2 sheet pans if you have the standard size.
- Cook Uncovered- There is no need to cover your greens while they are roasting. The proximity of the heat to the veggie will actually caramelize them and lock in the sweet and savory taste.
- These beans will be crisp-tender. If you like yours softer then cook them a few minutes longer. Just check after 2-3 minutes. The longer the cook time the softer the texture will be and they will turn more of a olive green/brown color. This is fine, they will still taste awesome!
Frequently Asked Questions
Buy fresh green beans. When you wash them, pat dry and be sure that they are not waterlogged to begin with. Trim the edges, and roast, uncovered, with butter, oil, and seasonings, so that water will not affect your dish.
Green beans can be cooked covered or uncovered depending on how soft or crisp you prefer them to be. If you desire a softer texture, cook a pound of green beans with a half cup of water, covered. If you prefer a more crisp texture, roast with butter or oil at 400 degrees and bake uncovered.
The short answer is no, you don’t. Blanching stops enzyme action, which helps the beans to keep their color, flavor, and texture. All good qualities, but if you are going to cook and eat the beans right away, blanching isn’t necessary.
If you are going to freeze green beans, as a way of preserving them, then you should blanch them first. It will give you the right color, texture, and flavor for all your green bean recipes.
If you can’t find fresh green beans, you can use frozen. They should be thawed first and patted dry. You may need to adjust your cooking time.
If you start with frozen beans, the seasonings won’t stick. You will also have water in the pan (as they cook) which will give you a steaming effect rather than a roasting effect. For the true flavor of this recipe, use fresh.
Storage
- Store cooked green beans in an airtight container in the refrigerator for 3-5 days.
- To reheat, either pan fry or roast in the oven. They will lose their crispness after the first meal.
- It is not recommended to freeze cooked green beans as they will have a much softer and watery texture when unfrozen. However, they are safe to consume after freezing in an airtight container.
- Raw green beans will last in the refrigerator for 4-5 days.
Garlic Roasted Green beans are a quick and easy way to spruce up a side dish. I hope you enjoy it!
Related Recipes
Please share
Your shares are how this site grows and I appreciate each one. Do you know someone who would enjoy this recipe?
I’d love it if you would share it on your favorite Pinterest board or Facebook! AND…if you like this recipe, please do me a favor and give it a ⭐️ ⭐️ ⭐️ ⭐️ ⭐️ rating! TIA 🥰
You can also follow along on YouTube and Instagram!

Garlic Butter Green Beans
Equipment
- rimmed baking sheets
Ingredients
- 1 lb fresh green beans
- 1/4 cup butter melted
- 2 cloves garlic pressed
- 1 Tbs brown sugar
- salt and pepper to taste
Instructions
- Preheat oven to 400 degrees
- Wash beans and place in a large bowl.
- Combine melted butter, garlic and brown sugar, mix well.
- Pour the butter mixture over the green beans and toss well.
- Place the beans on a rimmed baking sheet and roast for 10-15 minutes until crisp tender.
- Serve immediately.
Notes
- Don’t overcrowd the pan. The air needs to circulate throughout the food for perfect roasting. You may need 2 sheet pans if you have the standard size.
- Cook Uncovered- There is no need to cover your greens while they are roasting. The proximity of the heat to the veggie will actually caramelize them and lock in the sweet and savory taste.
- These beans will be crisp-tender. If you like yours softer then cook them a few minutes longer. Just check after 2-3 minutes until you have the desired doneness. The longer the cooking time the softer the texture will be and they will turn more of an olive green/brown color. This is fine, they will still taste awesome!
Nutrition
HUNGRY FOR MORE? Subscribe to my newsletter, to have recipes delivered to your inbox and to stay up to date on the latest!


You’re welcome! Hope you like them. Glad to hear I’m not the only one with a thing for green beans as my side. 🙂
thanks so much! It adds just a touch of sweet.
These look so good! I love the addition of brown sugar in this recipe! Pinning to try next week!
YUM! I have green beans with dinner almost every night, and never thought to garlic roast them. Thank you for sharing!
Thank you so much Ginger! My mom always said sugar makes everything better… that, and bacon and butter. haha! Enjoy!
Ah, now this is my kind of recipe! I often roast broccoli and carrots in the oven like this, but haven’t tried green beans, and I like the idea of adding a touch of brown sugar. I bet they’re good cold the next day too, like in a salad! Thanks, and I’m pinning one of these lovely photos too!
–G
Awesome! Thanks!
They’re delicious! I wouldn’t say either recipe is ‘better’, just different. Enjoy!!
love this – was just wondering if roasted would be better than steamed – now I can try this – love the brown sugar idea, too. near you at randomly simple this evening.
I’ve been looking for a side like this. Can’t wait to try it. Pinned 🙂